Using Microsoft Assessment and Planning Toolkit to assess your environment for a move to Azure
Using Microsoft's free toolkit, evaluate your environment and understand what a move to Azure would look like for you

The Microsoft Assessment and Planning (MAP) toolkit is something that has been around for a long time, you might have used it to inventory your environment or used it recently to upgrade your desktops to Windows 10. It has many uses, in previous jobs I used it to collect some quick data around a customer's environment to help with migrations or capacity planning.
In my current job as a Cloud Solution Architect it's actually something I still have in my toolbox. In a few blog posts earlier this year I wrote about how you can use Azure Migrate to evaluate your environment for a move to Azure, if you haven't read them the posts can be found at:
As an alternative to Azure Migrate, the Microsoft Assessment and Planning (MAP) toolkit can be used. You can use it to discover servers within your environment, collect performance data and find out what servers are ready for a move to Azure and what virtual machine (VM) sizes could be used in Azure.
For some people at the start of their cloud journey using something like Azure Migrate can be to involved and involves transferring some data about their environment to Azure which their security team hasn't cleared yet so using MAP to do an initial assessment is ideal as it agentless. Plus the data collected can be stored on-premises so no conversations need to be had with Security about data going to the cloud. It doesn't give you as much detail are you'll get with Azure Migrate, especially around the server dependencies. However, if you are looking to understand which of your servers are compatible with Azure and get the Azure VM sizes for your machines to do costings then MAP will serve you well.
Getting Started
MAP is a free piece of software from Microsoft, to utilise it in your environment you need to download it first. The latest version of MAP can be downloaded from https://www.microsoft.com/en-gb/download/details.aspx?id=7826
You can install MAP on a desktop/laptop PC or a dedicated box, in terms of requirements you need for the following:
-
Operating System, any of the following:
- Windows 10 (Professional, Enterprise and Ultimate editions only)
- Windows 8.1 (Professional and Enterprise editions only)
- Windows 8 (Professional and Enterprise editions only)
- Windows 7 with Service Pack 1 (Professional, Enterprise, and Ultimate editions only)
- Windows Server 2012 R2
- Windows Server 2012
- Windows Server 2016
- Windows Server 2008 R2 with Service Pack 1
-
Hardware Requirements:
- A dual-core 1.5GHz processor
- 2.0 GB of RAM
- 1 GB of available disk space
- Network adapter card
When you install the MAP Toolkit it will install SQL Server 2012 Express LocalDB. If you have a SQL Server 2012, 2014, or 2016 server that you wish to use with MAP you can however, you need to create an instance named "MAPS" before running the MAP Toolkit installer. The toolkit requires, the good old favourite collation to be set to "SQL_Latin1_General_CP1_CI_AS".
Collect Inventory Data
The first step in using MAP is to get it to collect your inventory. There are several methods you can use to discover servers within your environment;
- Active Directory Domain Services
- Windows Networking protocol
- System Center Configuration Manager
- Scanning an IP address range
- Manually entering computer names
- Importing computer names from a file
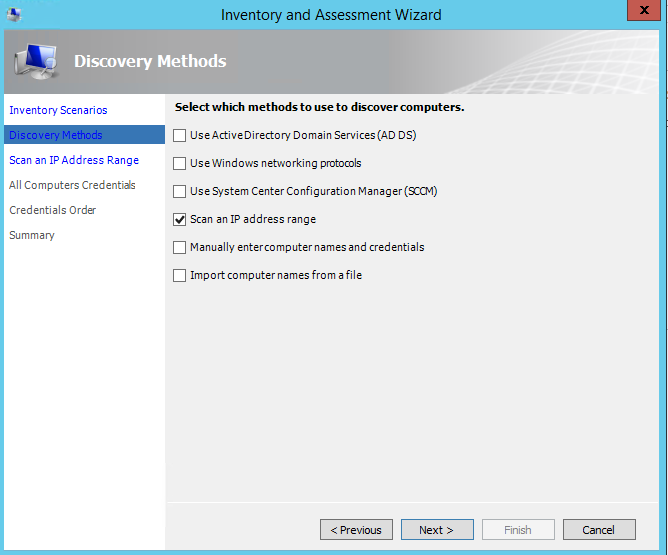
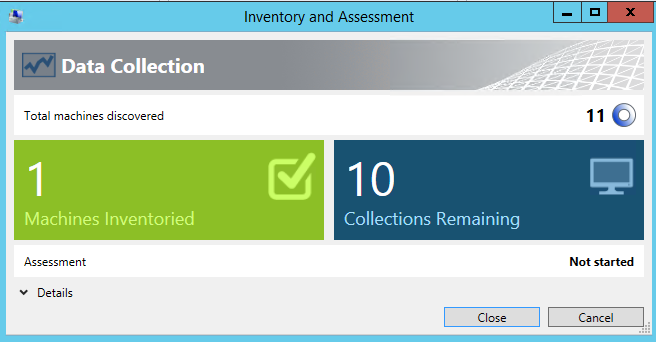
Once you've selected the relevant option for your environment the next stage is to add credentials so that the toolkit can access the servers. Once you provide the inventory wizard with all the information it will go off and scan what you've asked it to. Depending on how the discovery method or the amount of servers you are looking for the scan could take awhile.
View the Azure VM Readiness results
Now that the toolkit has collected the inventory data from your environment it is time to view the results and the report. Within the toolkit you will get a visual representation of the results. Below is a picture of what the results looked like in my home lab:
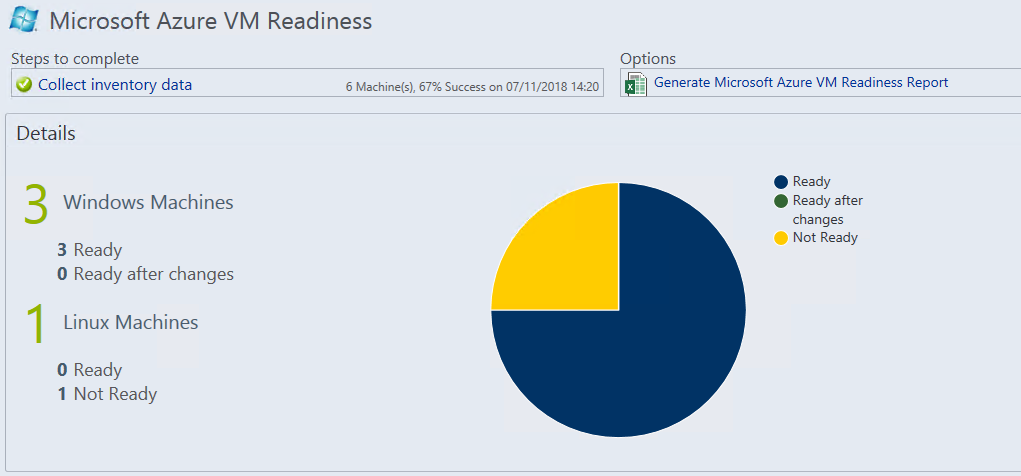
There is also a Excel report that goes into much more detail around the Azure readiness of your environment this can be downloaded and dissected accordingly. The report goes into areas such as whether or not the server will be supported in Azure or not. This will allow you decide what your migration strategy will look like. And allow you to have conversations with the owners of the servers about the plan moving forward. Sometimes with certain applications (and timelines) you may need to leave infrastructure on premises until you can make it "Azure ready". No matter the reason for your migration to Azure you shouldn't be trying to shoe horn something into it just for the sake of it.
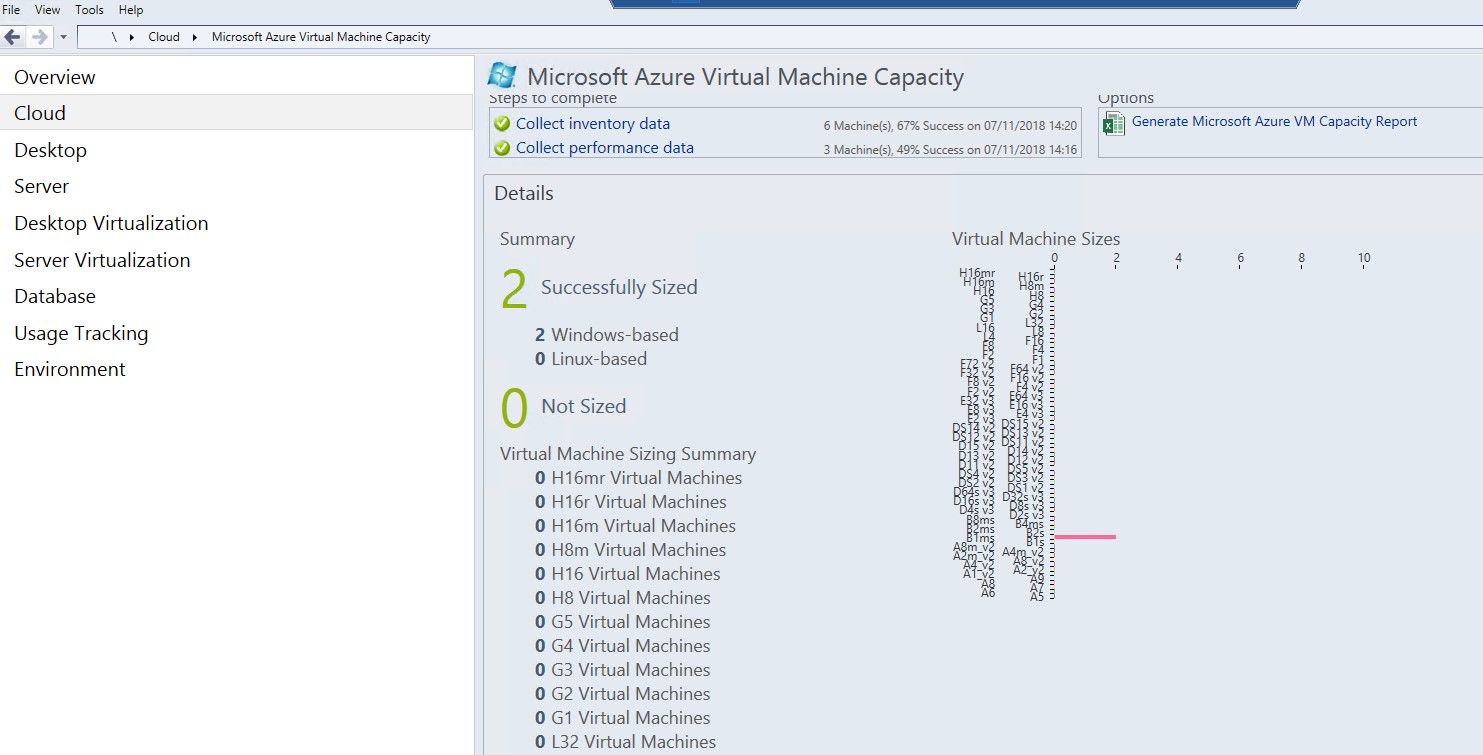
Machine sizing results
Another feature of the MAP tool is that it uses the performance data it's collected to recommend Azure t-shirt sizes that might be suitable for your machines when they move to Azure. This information is provided to you in the Microsoft Azure Virtual Machine Capacity section.
Again these results are available to download as an Excel spreadsheet for further analysis. Unfortunately you don't get any costings with this report, you would need to take that information and use the Azure Pricing Calculator to work out an estimate of moving your environment to Azure.
Conclusion
The Microsoft Assessment and Planning Toolkit isn't a complete migration discovery or planning tool, but it is a great gateway tool to use to get some quick information about your environment which can help lead into large migration conversations.
As always if you’d like to reach out and speak to me about any of the above please get in touch via Twitter @TechieLass