Estimate cloud costs with Terraform and Infracost
Learn how to integrate Infracost with Terraform to estimate Azure, AWS, and GCP cloud costs before deployment and improve your FinOps practices.

Costing out your infrastructure has always been a challenge. Trying to compare vendors and options. It can be very time-consuming.
In this blog post, I aim to demonstrate how you can integrate a tool called Infracost into your Infrastructure as Code (IaC) workflow to help you accurately estimate cloud costs.
What is Infracost?
Infracost is a tool designed to estimate the cost of your infrastructure based on what you are deploying via your Infrastructure as Code (IaC) configurations.
It analyses what is being defined and deployed within your IaC files and provides a detailed overview of what costs you will encounter. When using Infracost, it allows your engineering teams to understand what impact deploying those resources will have and allow them to have the correct information to make informed decisions.
Currently, Infracost works with Azure, AWS and Google Cloud, but only works with Terraform. But the team is hoping to extend support to Pulumi, CloudFormation and Kubernetes. It can also be integrated into your CI/CD tooling, and support GitHub, GitLab and Azure Repos.
How to install Infracost and register
There are a few options in terms of how to install Infracost. I run Windows and use Chocolatey to help me install software so I am going to use that. For the other options, see the official documentation.
choco install infracost -y
After installing it, make sure it works by checking the version of it:
infracost –version
Once you have the software installed, you need to register to be able to use the tool. You can either sign up using your GitHub or Google account by running the following command:
infracost auth login
Estimating cloud costs with Infracost and Terraform
Now let’s use Infracost to estimate the cost of an Azure deployment defined in Terraform.
Let’s prepare some Terraform to estimate the cost of.
terraform {
  required_providers {
    azurerm = {
      source  = "hashicorp/azurerm"
      version = "~> 3.0"
    }
    azapi = {
      source  = "Azure/azapi"
      version = ">= 2.2.0, < 3.0.0"
    }
  }
backend "azurerm" {
    resource_group_name  = "rg-terraformstate"
    storage_account_name = "terraformstatetechielass"
    container_name       = "tfstate"
    key                  = "tfdemo.env0.tfstate"
  }
}

provider "azurerm" {
  features {}
}

provider "azapi" {
  # Configuration options
}

resource "azurerm_resource_group" "rg" {
  name     = "rg-demo-vm"
  location = "UK South"
}

resource "azurerm_virtual_network" "vnet" {
  name                = "vnet-demo"
  address_space       = ["10.0.0.0/16"]
  location            = azurerm_resource_group.rg.location
  resource_group_name = azurerm_resource_group.rg.name
}

resource "azurerm_subnet" "subnet" {
  name                 = "subnet-demo"
  resource_group_name  = azurerm_resource_group.rg.name
  virtual_network_name = azurerm_virtual_network.vnet.name
  address_prefixes     = ["10.0.1.0/24"]
}

resource "azurerm_network_interface" "nic" {
  name                = "nic-demo"
  location            = azurerm_resource_group.rg.location
  resource_group_name = azurerm_resource_group.rg.name

  ip_configuration {
    name                          = "internal"
    subnet_id                     = azurerm_subnet.subnet.id
    private_ip_address_allocation = "Dynamic"
  }
}

resource "azurerm_windows_virtual_machine" "vm" {
  name                = "win-vm-demo"
  resource_group_name = azurerm_resource_group.rg.name
  location            = azurerm_resource_group.rg.location
  size                = "Standard_D4s_v3"
  admin_username      = "azureuser"
  admin_password      = "P@ssword1234!"
  network_interface_ids = [
    azurerm_network_interface.nic.id,
  ]

  os_disk {
    caching              = "ReadWrite"
    storage_account_type = "Standard_LRS"
  }

  source_image_reference {
    publisher = "MicrosoftWindowsServer"
    offer     = "WindowsServer"
    sku       = "2019-Datacenter"
    version   = "latest"
  }
}
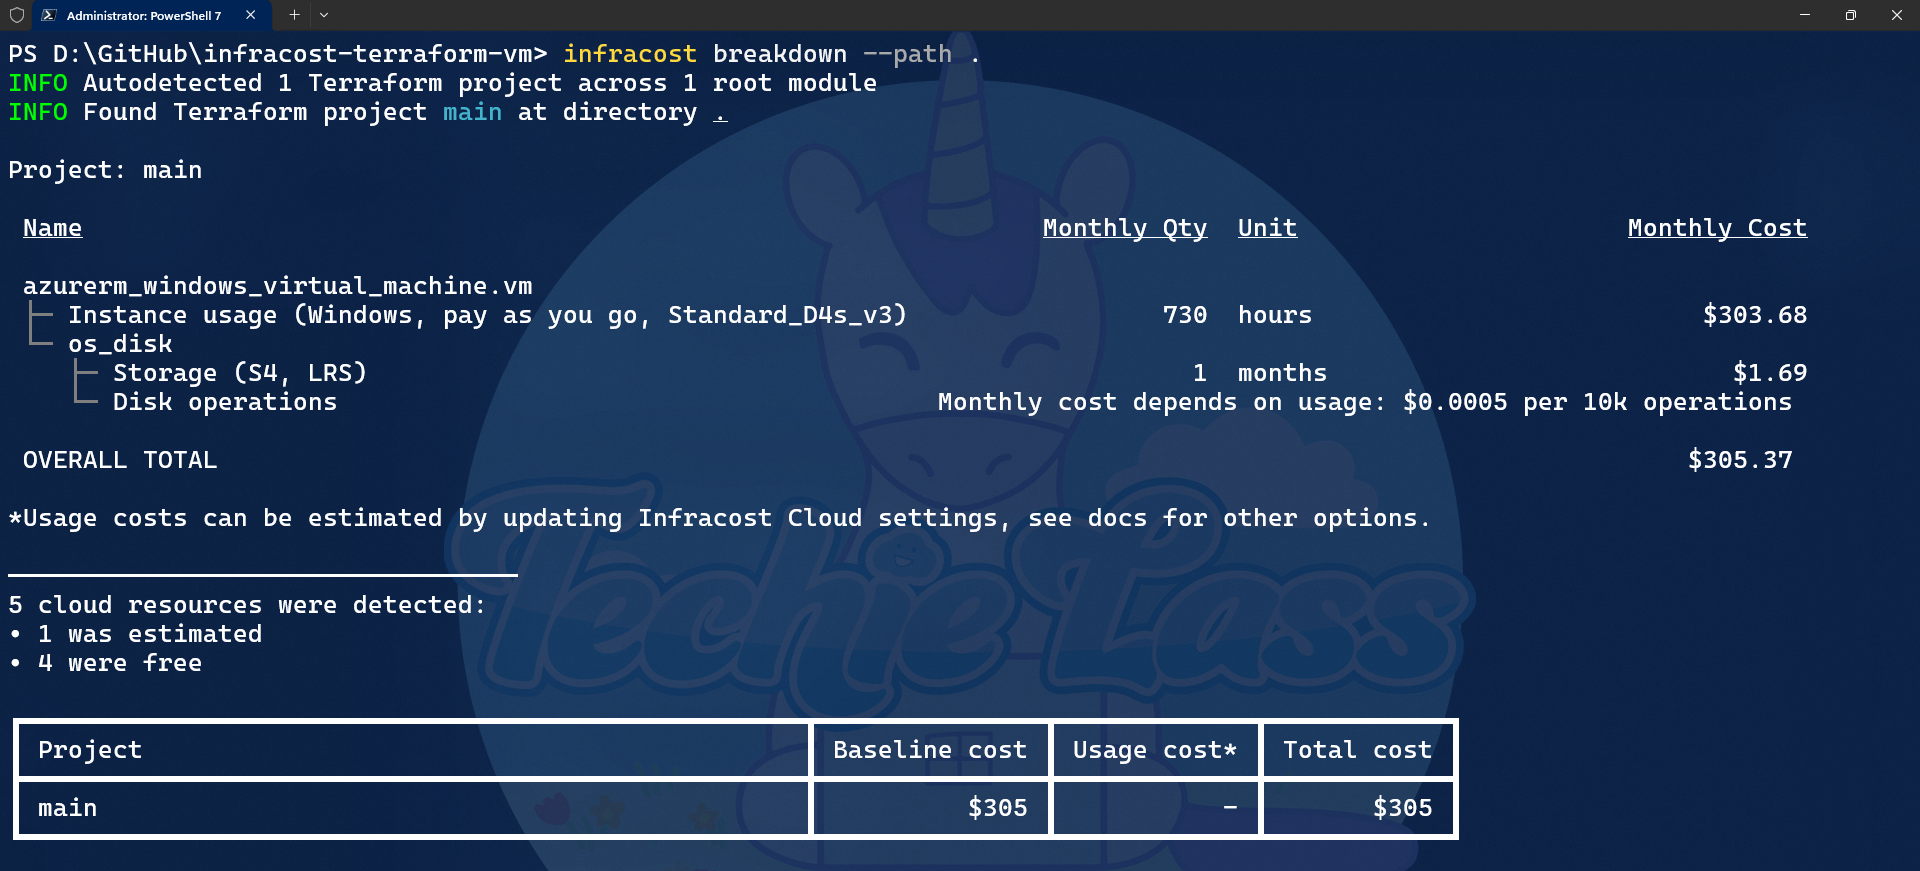
We're creating an Azure Virtual Machine (VM) and supporting resources within our Terraform. Using that, let’s look at what the cost will look like for them. To do that, you must first go to the directory that holds your configuration files and run the following command:
infracost breakdown -- path .
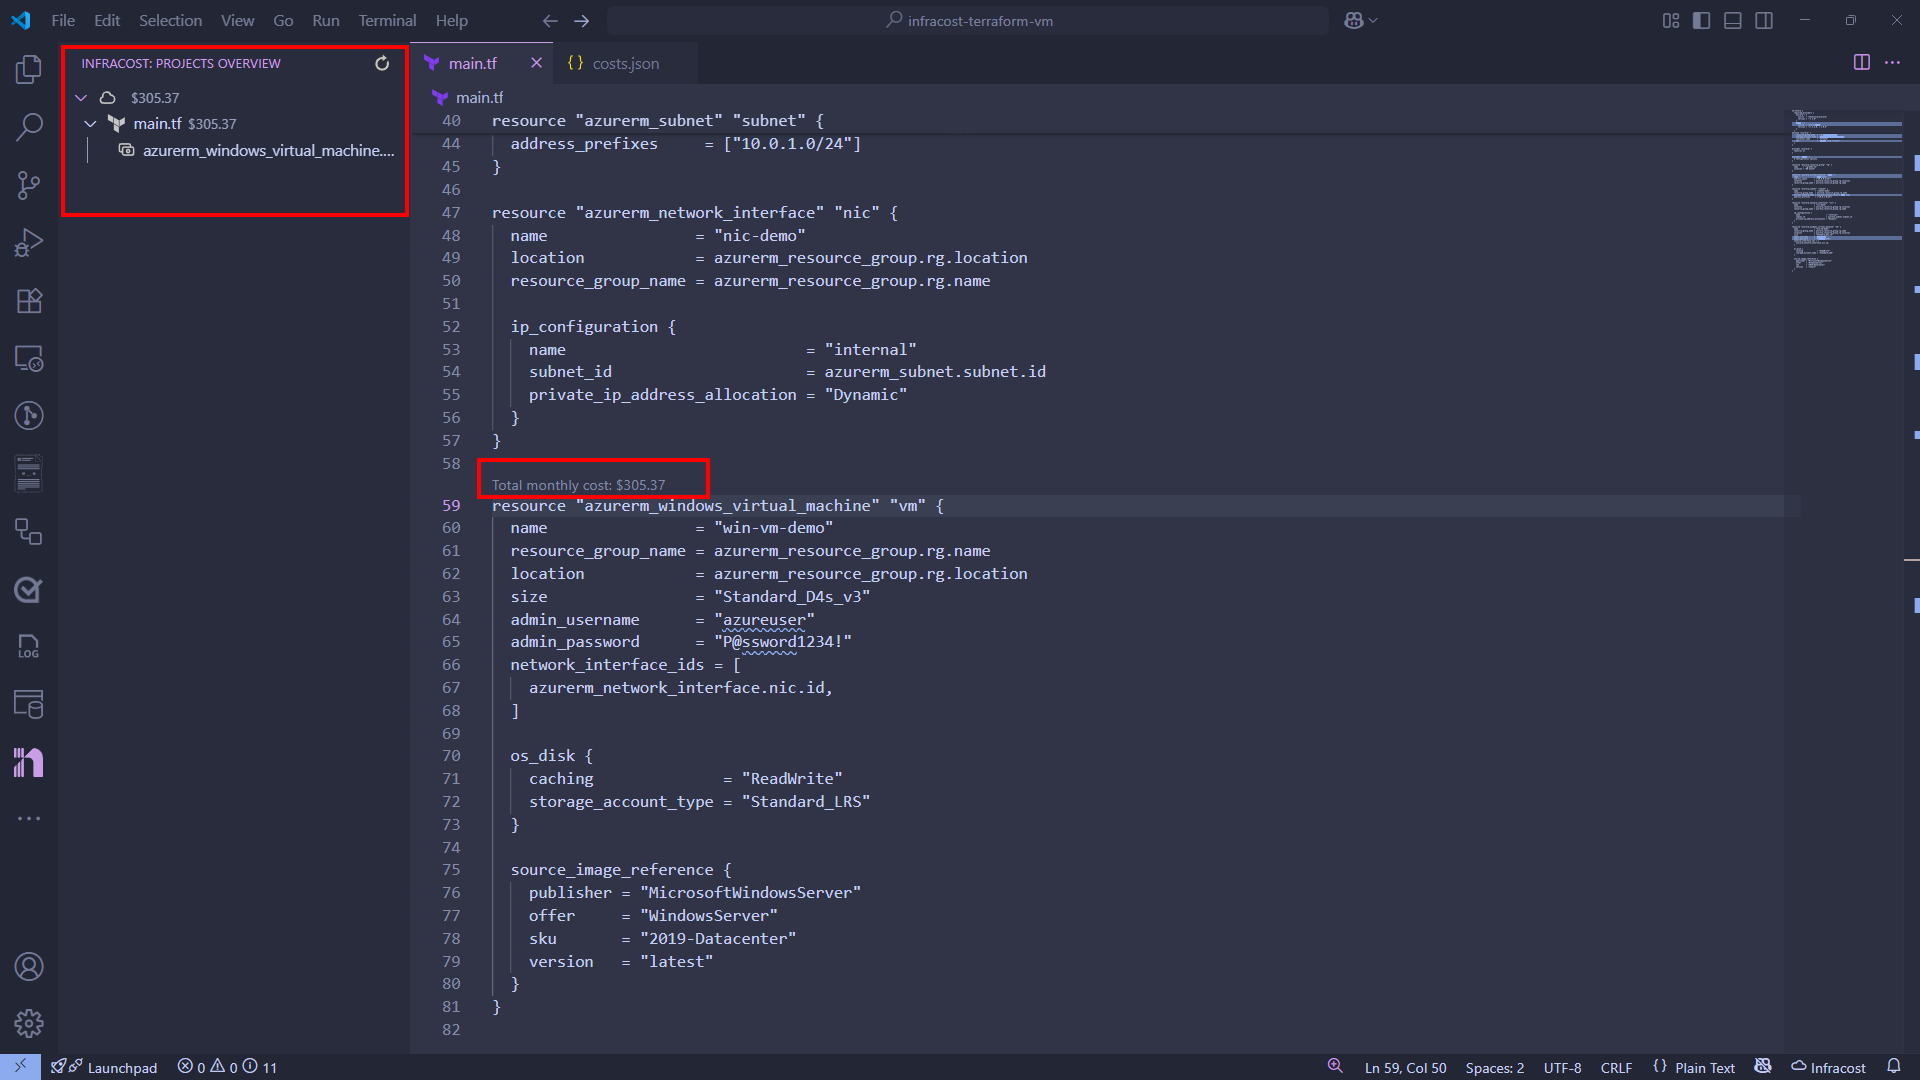
There is also a VS Code Extension available for Infracost. It can help show you as you write the code what the price of your resources will be.
Infracost Pricing
There are several plans available depending on how you want to use Infracost. There is a free plan with limited functionality that can be great for individual engineers or home projects. However, there are two paid plans available for those seeking more functionality and for larger teams.
The paid plans offer the ability to create dashboards, tagging policies, FinOps policies, Jira integration, custom price books, and much more, which will improve your FinOps practices.
Final Thoughts
Infracost brings much needed cost visibility into your infrastructure workflow. Whether you are experimenting on your own projects or working on production workloads. It's a great way to align technical decisions with financial impact.