Troubleshoot Windows Server 2012 Arc-enabled servers not receiving updates
Walk through the necessary steps to troubleshoot why Windows Server 2012 Arc-enabled servers are not receiving monthly updates.

If your Windows Server 2012 servers that are Arc-enabled to receive their Extended Security Updates (ESU) aren’t receiving the updates or if you are receiving updates and they aren't being installed, here are some troubleshooting steps to work through to try and help resolve the issue.
This blog post will explore the steps needed to troubleshoot the issue.
Step 1 - Check the Azure Portal
The first step is to check the Azure portal to understand if the server has been assigned an ESU licence.
Head to https://portal.azure.com
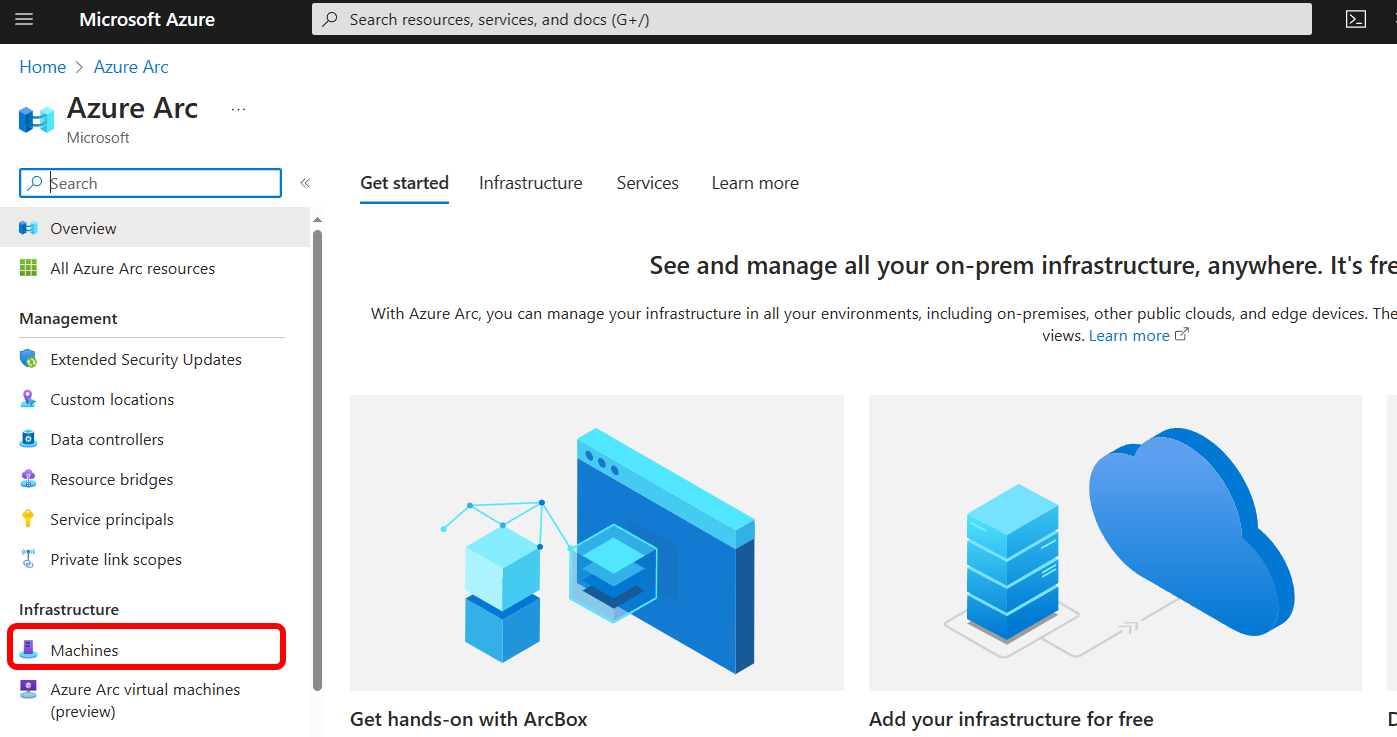
Launch the Azure Arc blade.
Click on Machines down the left-hand side.
Find the server that isn’t receiving updates.
Click on the server name.
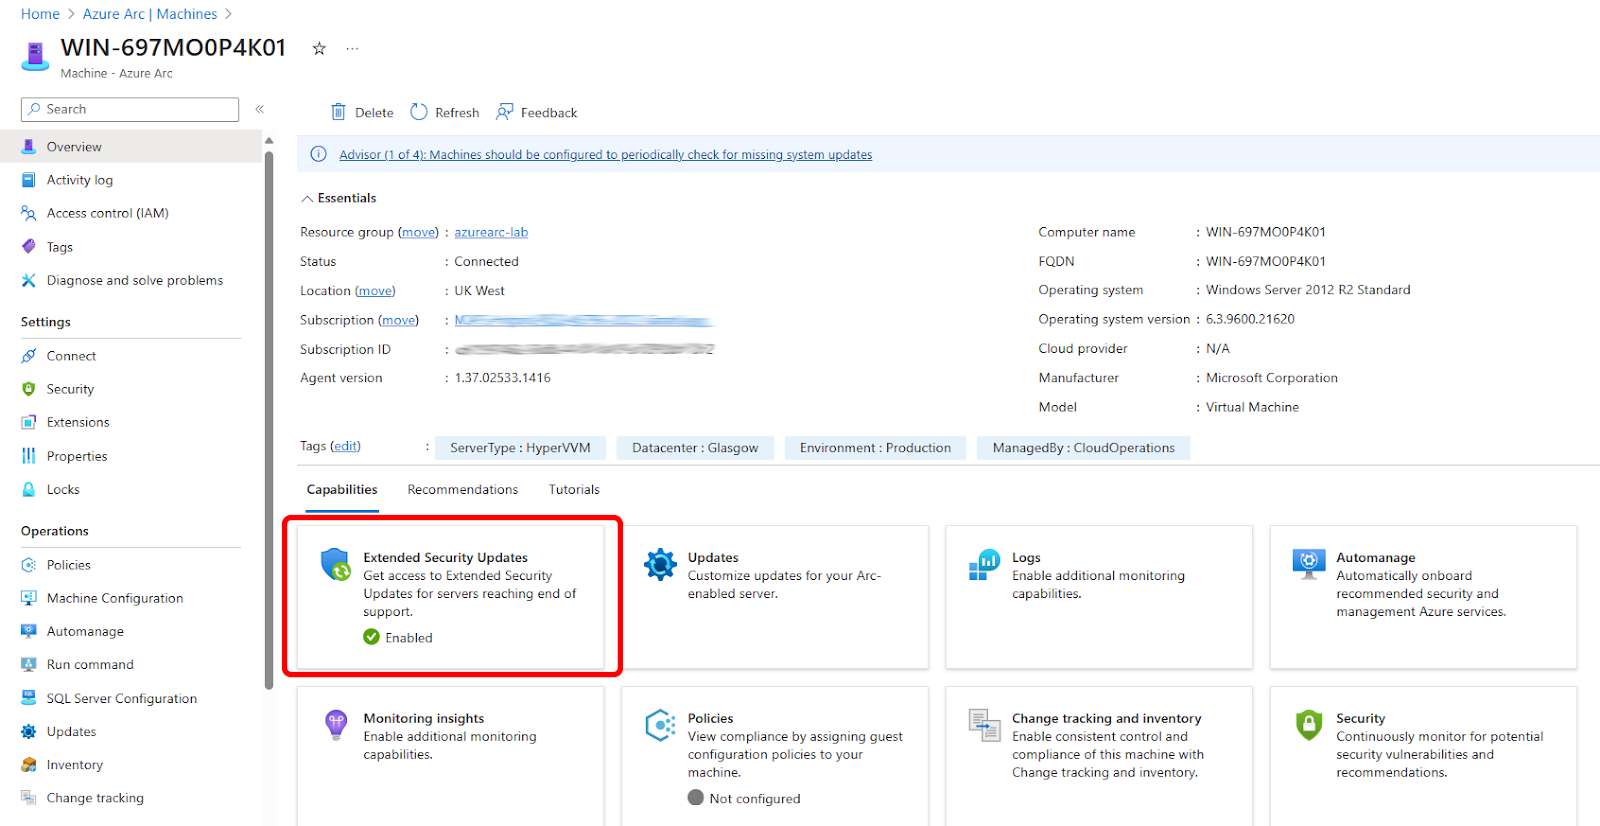
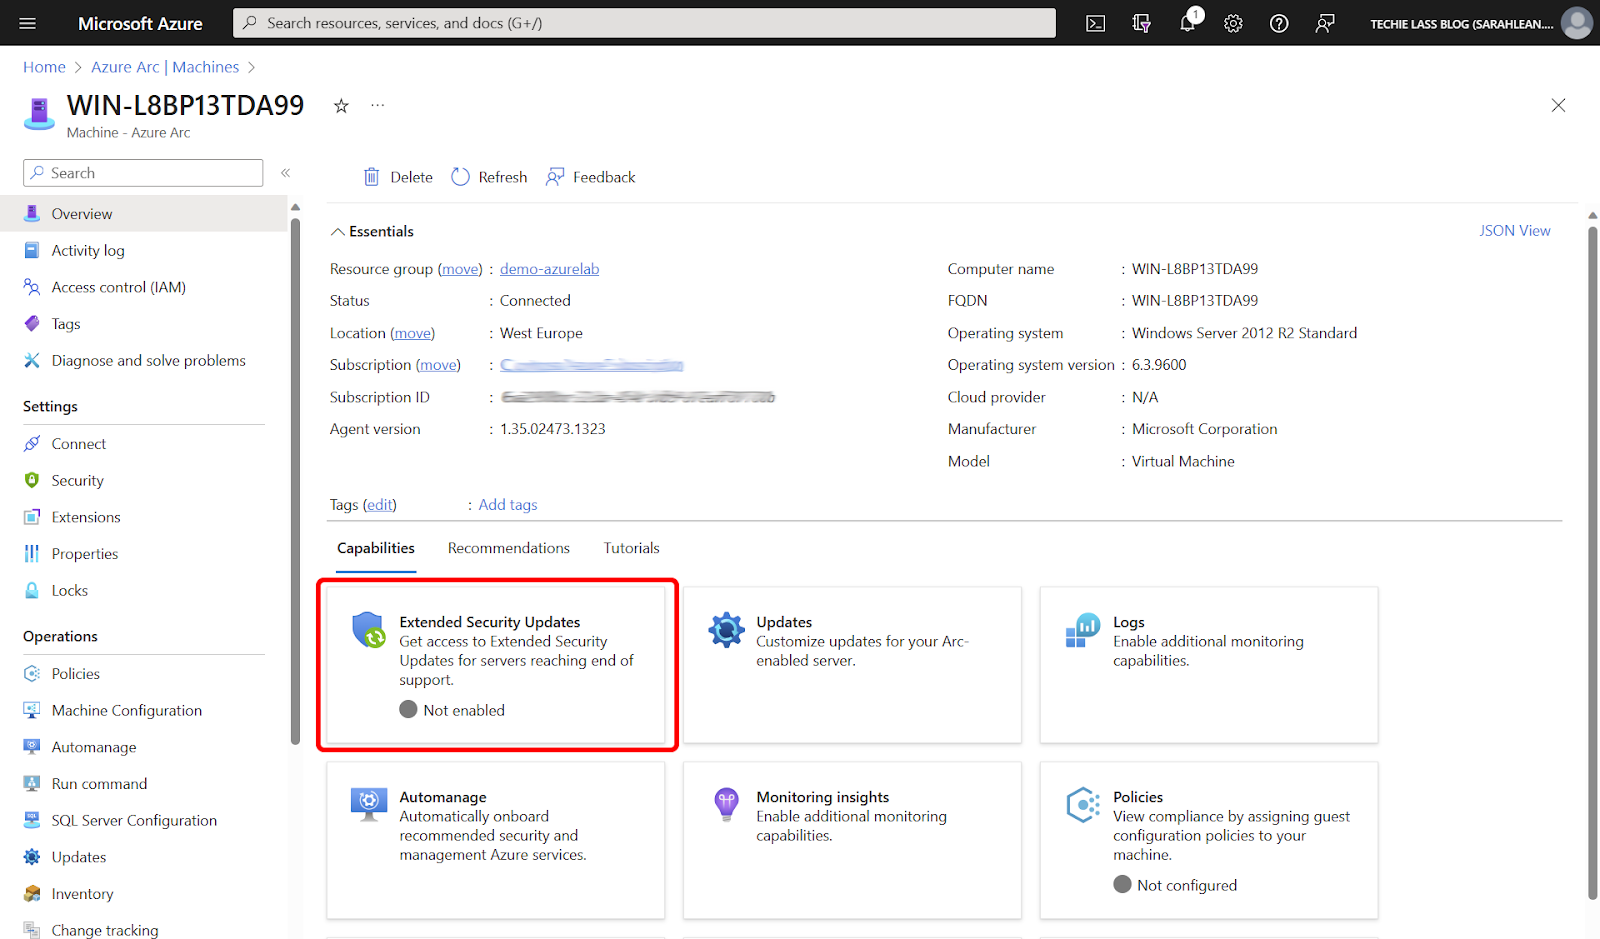
When the server information loads, check under capabilities to ensure ESU is Enabled.
If the server states that the ESU capability is Not Enabled, assign the correct ESU license to the server to enable it to receive updates.
If the server states that the ESU capability is Enabled, move on to the next troubleshooting step.
Step 2 - Check the Azure Arc version installed
The troubleshooting step to check is what version of the Azure Arc agent is installed.
The ESU capability was enabled on version 1.34 of the Azure Arc agent.
To check the version of the Arc agent log onto the affected server.
Launch a PowerShell command terminal and type in the following command:
azcmagent version
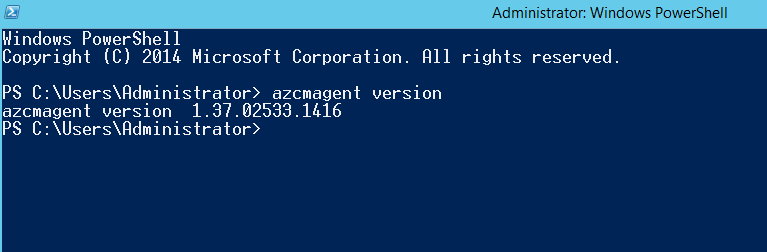
If the agent is below version 1.34, follow the upgrade processes to bring the agent to a higher level.
If the agent is level 1.34 or above move on to step 3.
Step 3 - Check the status of the Azure Arc agent
The next step is to ensure the Azure Arc agent is connected and working correctly as expected.
Launch a PowerShell command terminal and type in the following command:
azcmagent show
You are looking for two key pieces of information. The first one is the Agent status and Agent Last Heartbeat. They should state Connected and list a time or date close to your current time and date.
The second piece of information you are looking for is the Extended Security Updates Status. That should read as active.
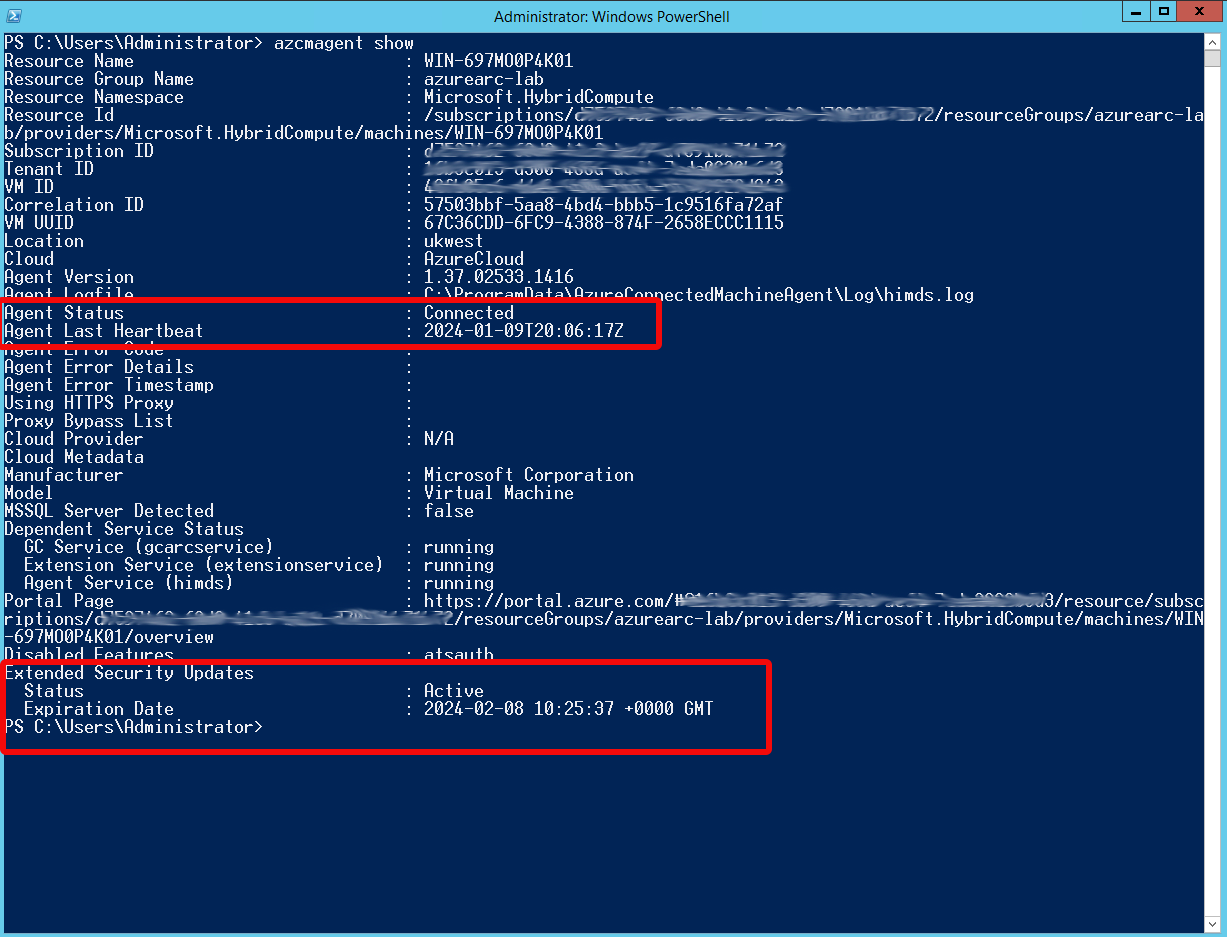
If these areas report as connected and active, then move to troubleshooting step 4. If the areas reported something else, please go through the Azure Arc agent pre-requisite requirements to ensure the correct networking and firewall rules etc are in place as required. Also, check if the appropriate ESU license is assigned and active.
Step 4 - Networking connectivity
The Azure Arc agent communicates from your non-Azure environment to Azure using several URLs, if outbound connectivity from your environment is restricted by your firewall, or proxy server, you need to ensure that the correct URLs are not blocked.
At the very minimum the agent needs access to
- *.guestconfiguration.azure.com (Extension management and guest configuration services)
- *his.arc.azure.com (Metadata and Hybrid Identity Service)
- login.microsoftonline.com (Microsoft Entra ID)
- login.windows.net (Microsoft Entra ID)
- pas.windows.net (Microsoft Entra ID)
- management.azure.com (Azure Resource Manager)
- www.microsoft.com/pkiops/certs (Certificates)
You can check network connectivity is working correctly by logging onto the server and launching a PowerShell command terminal and type in the following command:
azcmagent check --location “ukwest”
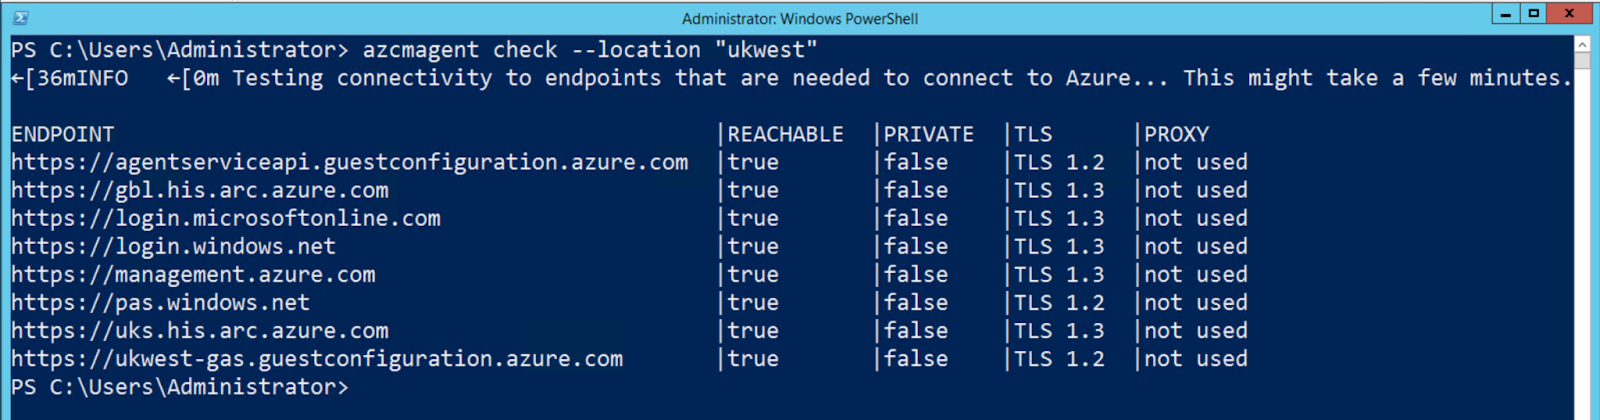
If you are using a different Azure region, ensure you input the correct name for your region. If you are unsure of the region name you can run the command az account list-locations -o table from Azure CLI to get a list.
If your network connectivity check is displaying any issues with the URLs, be sure to resolve them. If the network connectivity check is all okay, move onto step 5.
Step 5 - Check the registry
On the server, we want to confirm the registry setting is configured as it should. To do this click on the Windows icon, then search for regedit.
Check registry key:
[HKEY_LOCAL_MACHINE\SOFTWARE\Microsoft\Azure Connected Machine Agent\ArcESU] "Enabled”
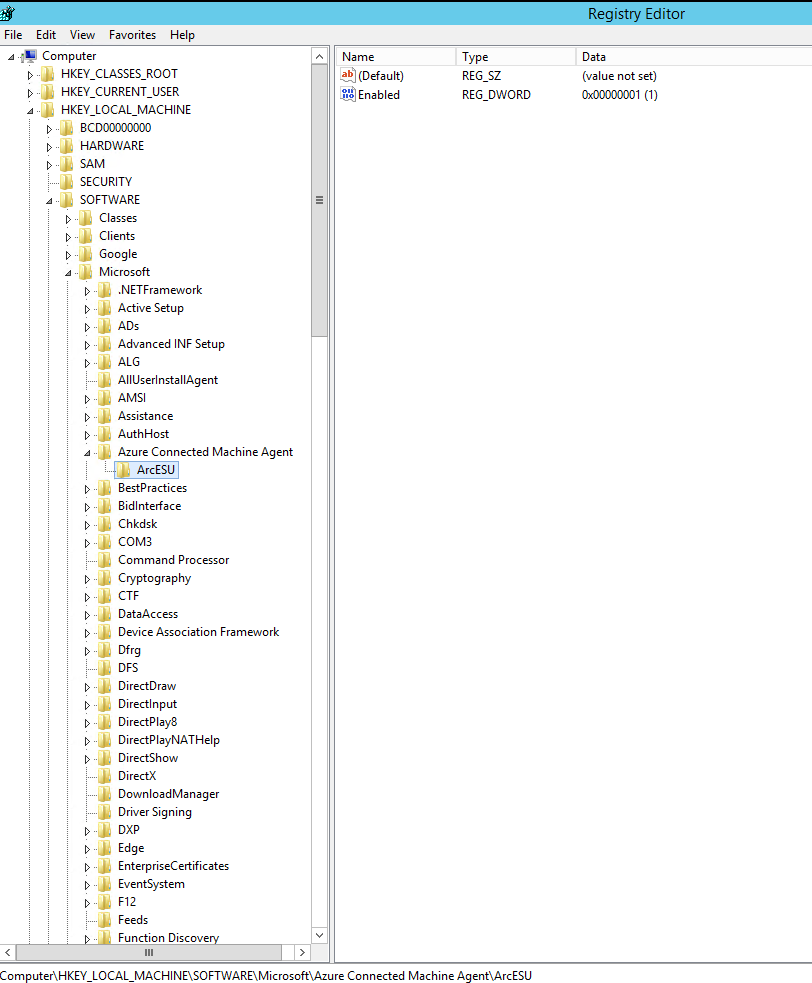
A value of 1 means that the machine can receive the latest Extended Security Update patches.
0 means the server is not enabled for Arc-based ESUs and won’t receive ESUs via that route.
Step 6 - Check patches
There are several pre-requisite patches that need installs on the server to ensure they can receive the relevant ESU updates. If you’ve been keeping your servers up to these should already be there. However if you have are signing up for ESU updates for Windows Server 2012 and haven't been receiving patches for several months, are there are some patches you might have to manually install first.
There are three patches required. The patch numbers are different depending on whether you are using Windows Server 2012 or the R2 version.
Windows Server 2012
- Servicing Stack Update (SSU) KB5029369
- Extended Security Update (ESU) Licensing Preparation Package KB5017221
- Servicing Stack Update (SSU) KB5037022
Windows Server 2012 R2
- Servicing Stack Update (SSU) KB5029368
- Extended Security Update (ESU) Licensing Preparation Package KB5017220
- Servicing Stack Update (SSU) KB5037021
Step 7 - Certificate Authorities
There are certain certificate authorities that are required for Extended Security Updates for Windows Server 2012/R2. You can find an up to date list of the certificates authorities required and how to get access to them if they aren't automatically downloaded on your machine here: https://learn.microsoft.com/azure/azure-arc/servers/prepare-extended-security-updates?tabs=azure-cloud#required-certificate-authorities
Step 8 - Recreate the signed license file
If you have patches being downloaded but are failing to install then try this. Open a command line prompt and stop the Azure Hybrid Instance Metadata Service (himds) by issuing this command:
Stop-Service himds
We want to rename the existing file and generate a new one, so still within your command prompt issue the command:
Rename-Item C:\ProgramData\AzureConnectedMachineAgent\Certs\license.json C:\ProgramData\AzureConnectedMachineAgent\Certs\license.bak
Now start the HIMDS service again with this command
Start-Service himds
The issue is still there
If you’ve checked through all of these steps and you still have an issue my next suggestions would be:
- Investigate your method of applying updates, for example, is the connection between this server and the WSUS server working correctly?
- Log a support ticket with Azure support - when you buy ESU through Azure you get free support when there is an issue with anything relating to the applying the patches.
Conclusion
By following these comprehensive troubleshooting steps, you can proactively address any challenges in the ESU update process, thereby enhancing the security posture of your Windows Server 2012 environments. Regularly monitoring and maintaining the ESU updates will contribute to a robust and resilient infrastructure, safeguarding your systems against potential vulnerabilities.