Reducing the echo in my home office - The beginning
Reducing the echo in my home office with homemade acoustic panels.


About a year ago, I moved into a new house with my husband. We've been slowly turning each of the rooms from boring white rooms into actual homely spaces. The room I used in the house for my home office, hasn't received much attention. I did get myself a new desk and chair for the room, so I now have a standing desk and a chair that supports my back a lot better. I admittedly have hung three pictures, a small whiteboard and a old fashioned calendar to make the place a bit more homelier.
One issue I have been pondering how to fix is the sound echo, or bounce within the room. The room is a bit of a dog leg or L shaped room, so I imagine there is a lot of weird issues with the sound bouncing all round. Over the last year I've looked at getting some of acoustic foam, but always been put off by the overwhelming choice, horrid black colour and not really understanding how or where to stick it.
However, after a chat with a friend who is an audiophile, musician, producer, all round good guy and sound guru, I realised I had to do something as there is only so much I can do post recording within software to get rid of that echo/bounce.
But going down the route of using acoustic foam still didn't appeal to me, I wanted something that would be nice to look at as well as functional. So after a quick search on the Interweb & YouTube I discovered I could make some DIY acoustic panels out of stuff from my local DIY/hardware stores.
I watched an absolute ton of videos and looked a pricing up all the tools and parts I would need to purchase and although it all worked out a lot more expensive than just buying some foam panels from that online retailer we all know I decided the aesthetics and fun element of the project would be worth it.
DIY Acoustic Panels
Ultimately what I was going to end up building was a frame that contained some acoustic material/sound insulation and then covered in some nice fabric. And the hung up on my walls at different points.
List of things needed
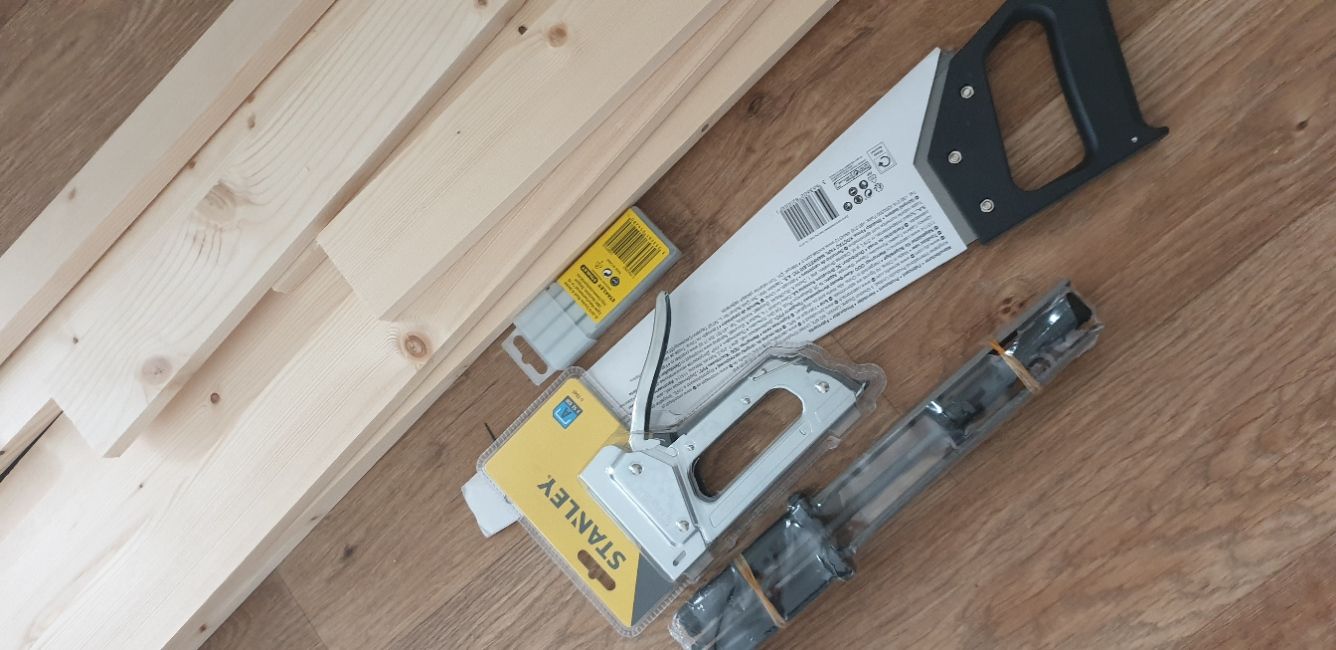
Tools
I have some DIY tools but I am still missing some things I'd like so I had to buy a few of these items.
- Saw
- File/Sandpaper
- Staple Gun
- Screwdriver
- Drill
- Measuring tape
- Knee pads (save the old knees while crawling about making the panels)
- Fabric scissors (I didn't have these but I wish I had thought of them)
- Eye protection (for safety reasons)
- Ear protection (for safety reasons)
- Gloves (for safety reasons)
Materials
Rock wool
Now this is a bit of a disclaimer, Rock Wool is usually used by house builders and put in your walls to help with sound insulation. It is designed to help reduce the noise between rooms so isn't specially designed for acoustic panels. But if you search on YouTube there is a lot of people using it for that reason.
Fabric
As I mentioned earlier I wanted something aesthetically pleasing so I headed to IKEA for some fabric. I would need some plain fabric for the back of the panels, as I wanted to contain the Rock Wool and I would need some good looking fabric for the front. IKEA offered both those options and a good choice at a good price range as well. And again I didn't need to go bespoke with any of that.
Panels
I decided to make panels big enough to fit 2 pieces of Rock Wool (1200mm x 600mm x 40mm). Which kinda worked out well in terms of picking up wood from my local hardware store without having to get something bespoke/custom. This meant as well, I was going to be able to cover some good chunks of the room with the panels, which would be great for helping to "catch" the sound bouncing around the room. As well as fill up some of the white walls that I have.
Putting it together
Now that I'd assembled all the tools and materials to put this project together I headed back home and started to put it together. I've made a second blog post about this, so head over here to see how I put it all together and learn from what I did wrong.