Install Windows Terminal with Windows Package Manager
Join me as I look at installing Windows Terminal using Windows Package Manager

Windows Terminal went generally available in May 2020, and since then, I've seen a lot of people utilise it as their go-to console for day-to-day use.
And I'm one of those people; having a console that offers me the chance to work in PowerShell, Linux or Azure CLI from one window is great.
If you haven't already got Windows Terminal installed on your machine, I'd highly recommend you do, and here's my guide to installing it via Windows Package Manager. 😉
Install Windows Package Manager
The first thing you need to ensure you have on your system is Windows Package manager; it's straightforward to install on your Windows 10 machine. Head over to https://github.com/microsoft/winget-cli/releases, and download the latest .appxbundle file,.appxbundle file and install that on your device.
Below is a quick video of the process.

Install Windows Terminal
Now that we have Windows Package Manager installed, we want to look at installing Windows Terminal. To do that, we need to open up a PowerShell window and then issue the command:
winget search Terminal
This will enable the Windows Package Manager to search for all the software in its repository with the word Terminal in its name or metadata.
We should get a list of options back.
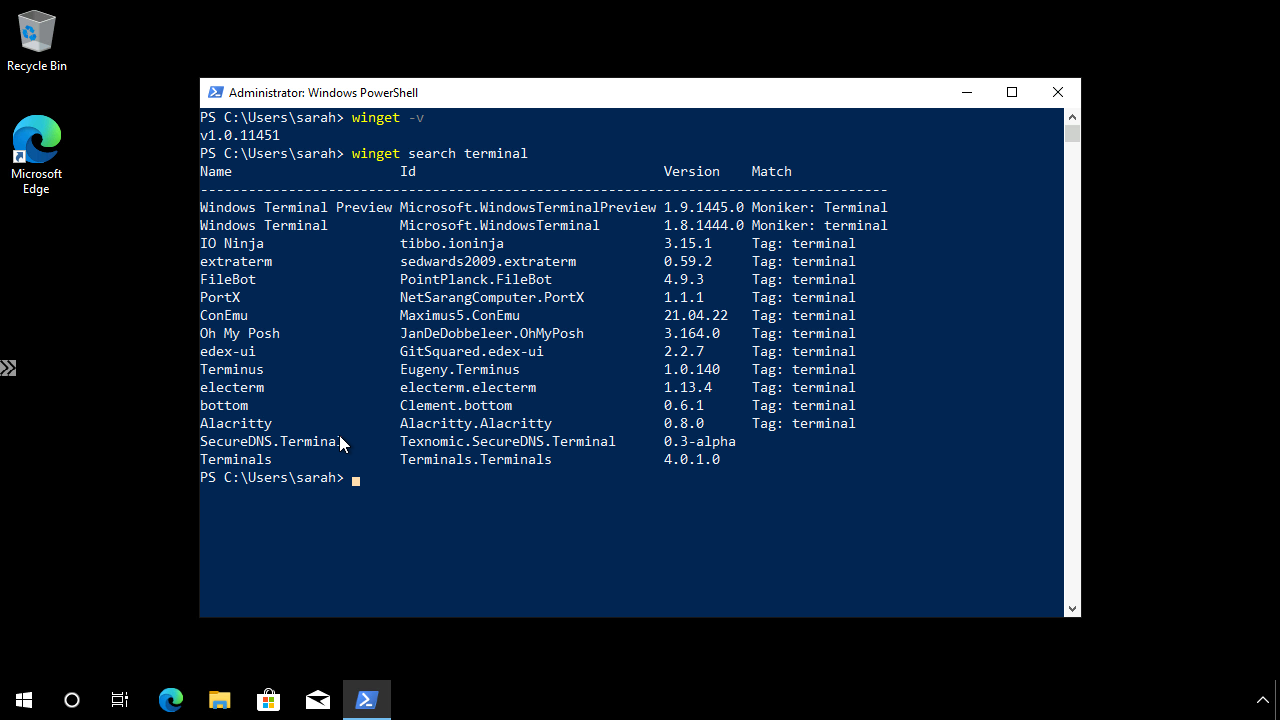
We are looking to install the stable version, but you can see that the Preview version is also available.
To install the stable version, we need to issue the following command:
winget install Microsoft.WindowsTerminal
After a few moments, the software will be installed, and we can start using Windows Terminal and customising it!