Install software to a different location using Windows Package Manager
Join me as I look at how you can use Windows Package Manager to install software to a custom location of your choosing.

Windows Package Manager is a great tool that can be used to help install, uninstall and keep your software update to date on your PC. I've covered it's full functionality in previous blog posts here.
In this blog post, I want to cover the question of what happens if you don't want to accept the default install location of a piece of software and have a dedicated location for software installs. Can you still use Windows Package Manager to do the installation?
The short answer is yes. Let's look at how. 😊
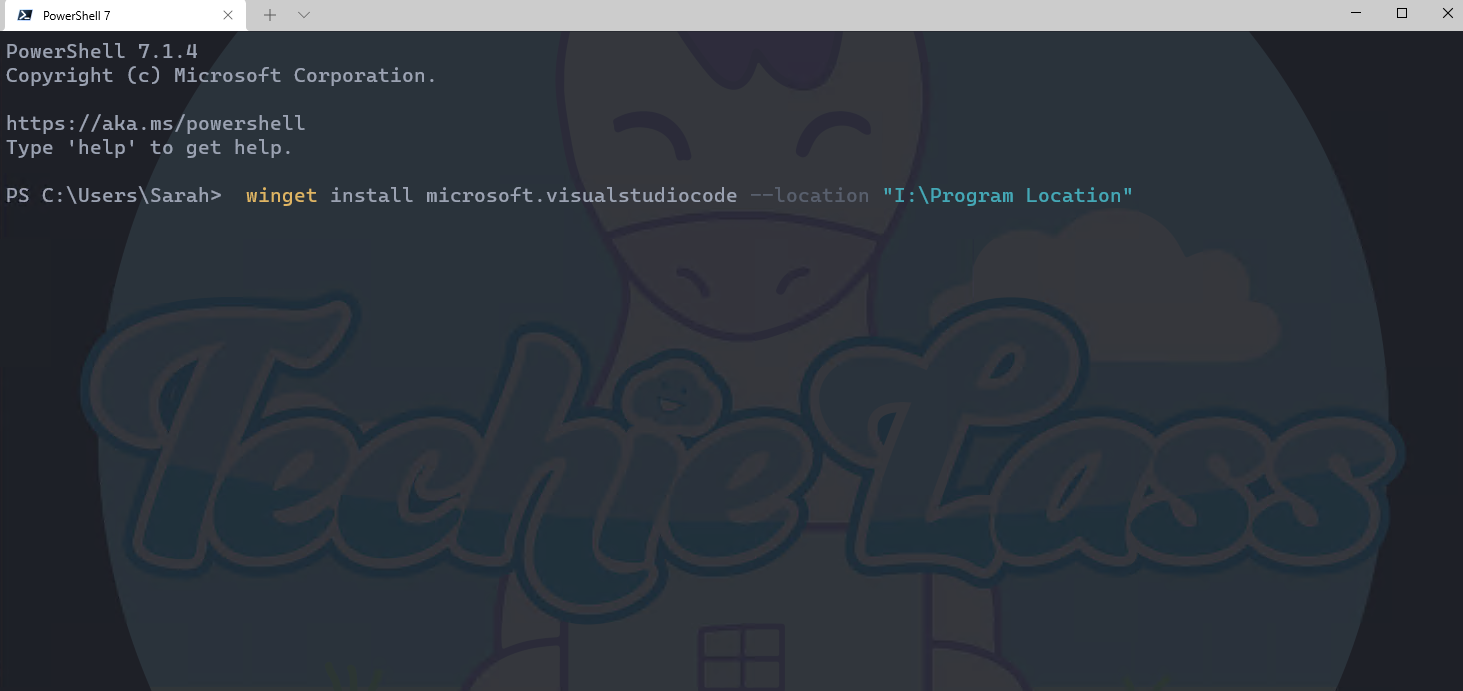
So you have a dedicated drive or folder that isn't the "default install location" for software. How do you tell Windows Package Manager to install in that location? With the winget install command you have several options you can use to get the command to do what you want. For this example, we would use the --location option.
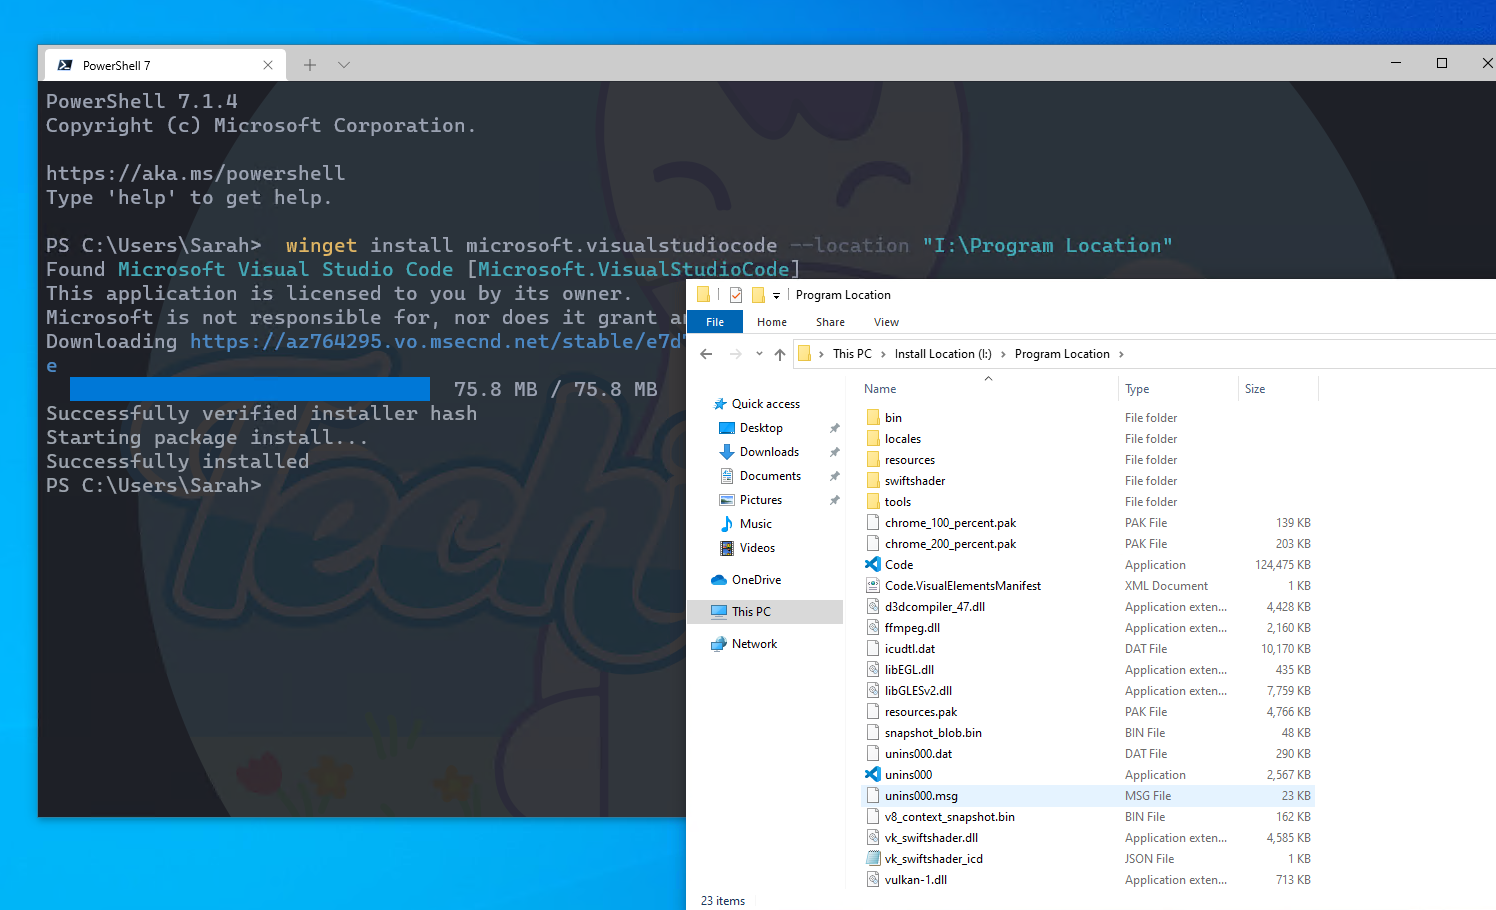
For example, if you want to install Microsoft Visual Studio Code to a different drive and folder, you would use the command: winget install microsoft.visualstudiocode --location "I:\Program Location"
And if we look at that location once the command has completed, we can see it's installed the software to the location we wanted.
So as I said, you can still use Windows Package Manager to install software on your machine even if you don't want to use the default install locations.
Install Windows Package Manager today and give it a try for yourself!