How to install Hugo on Windows 10
Join me as I install Hugo on Windows 10


So Hugo is one of those things that I've dabbled with, struggled with, cursed at, and celebrated. I am once again diving into the realm of trying to make Hugo create a nice looking website for me once again. So I've had to install it on my system.
I wanted to share this quick tutorial of installing Hugo on my Windows 10 machine to start the journey with ya'll. 😊
Download the Hugo latest version
First thing to do is go and download the latest release of Hugo from their official download area - Hugo GitHub Releases. You are looking for the file that is called "hugo_version_windows-amd64.zip"
With that file now on your machine you need to get Hugo installed...
Install Hugo
Take the zip file that you've just downloaded and extract it, I always extract to C:\Hugo\bin
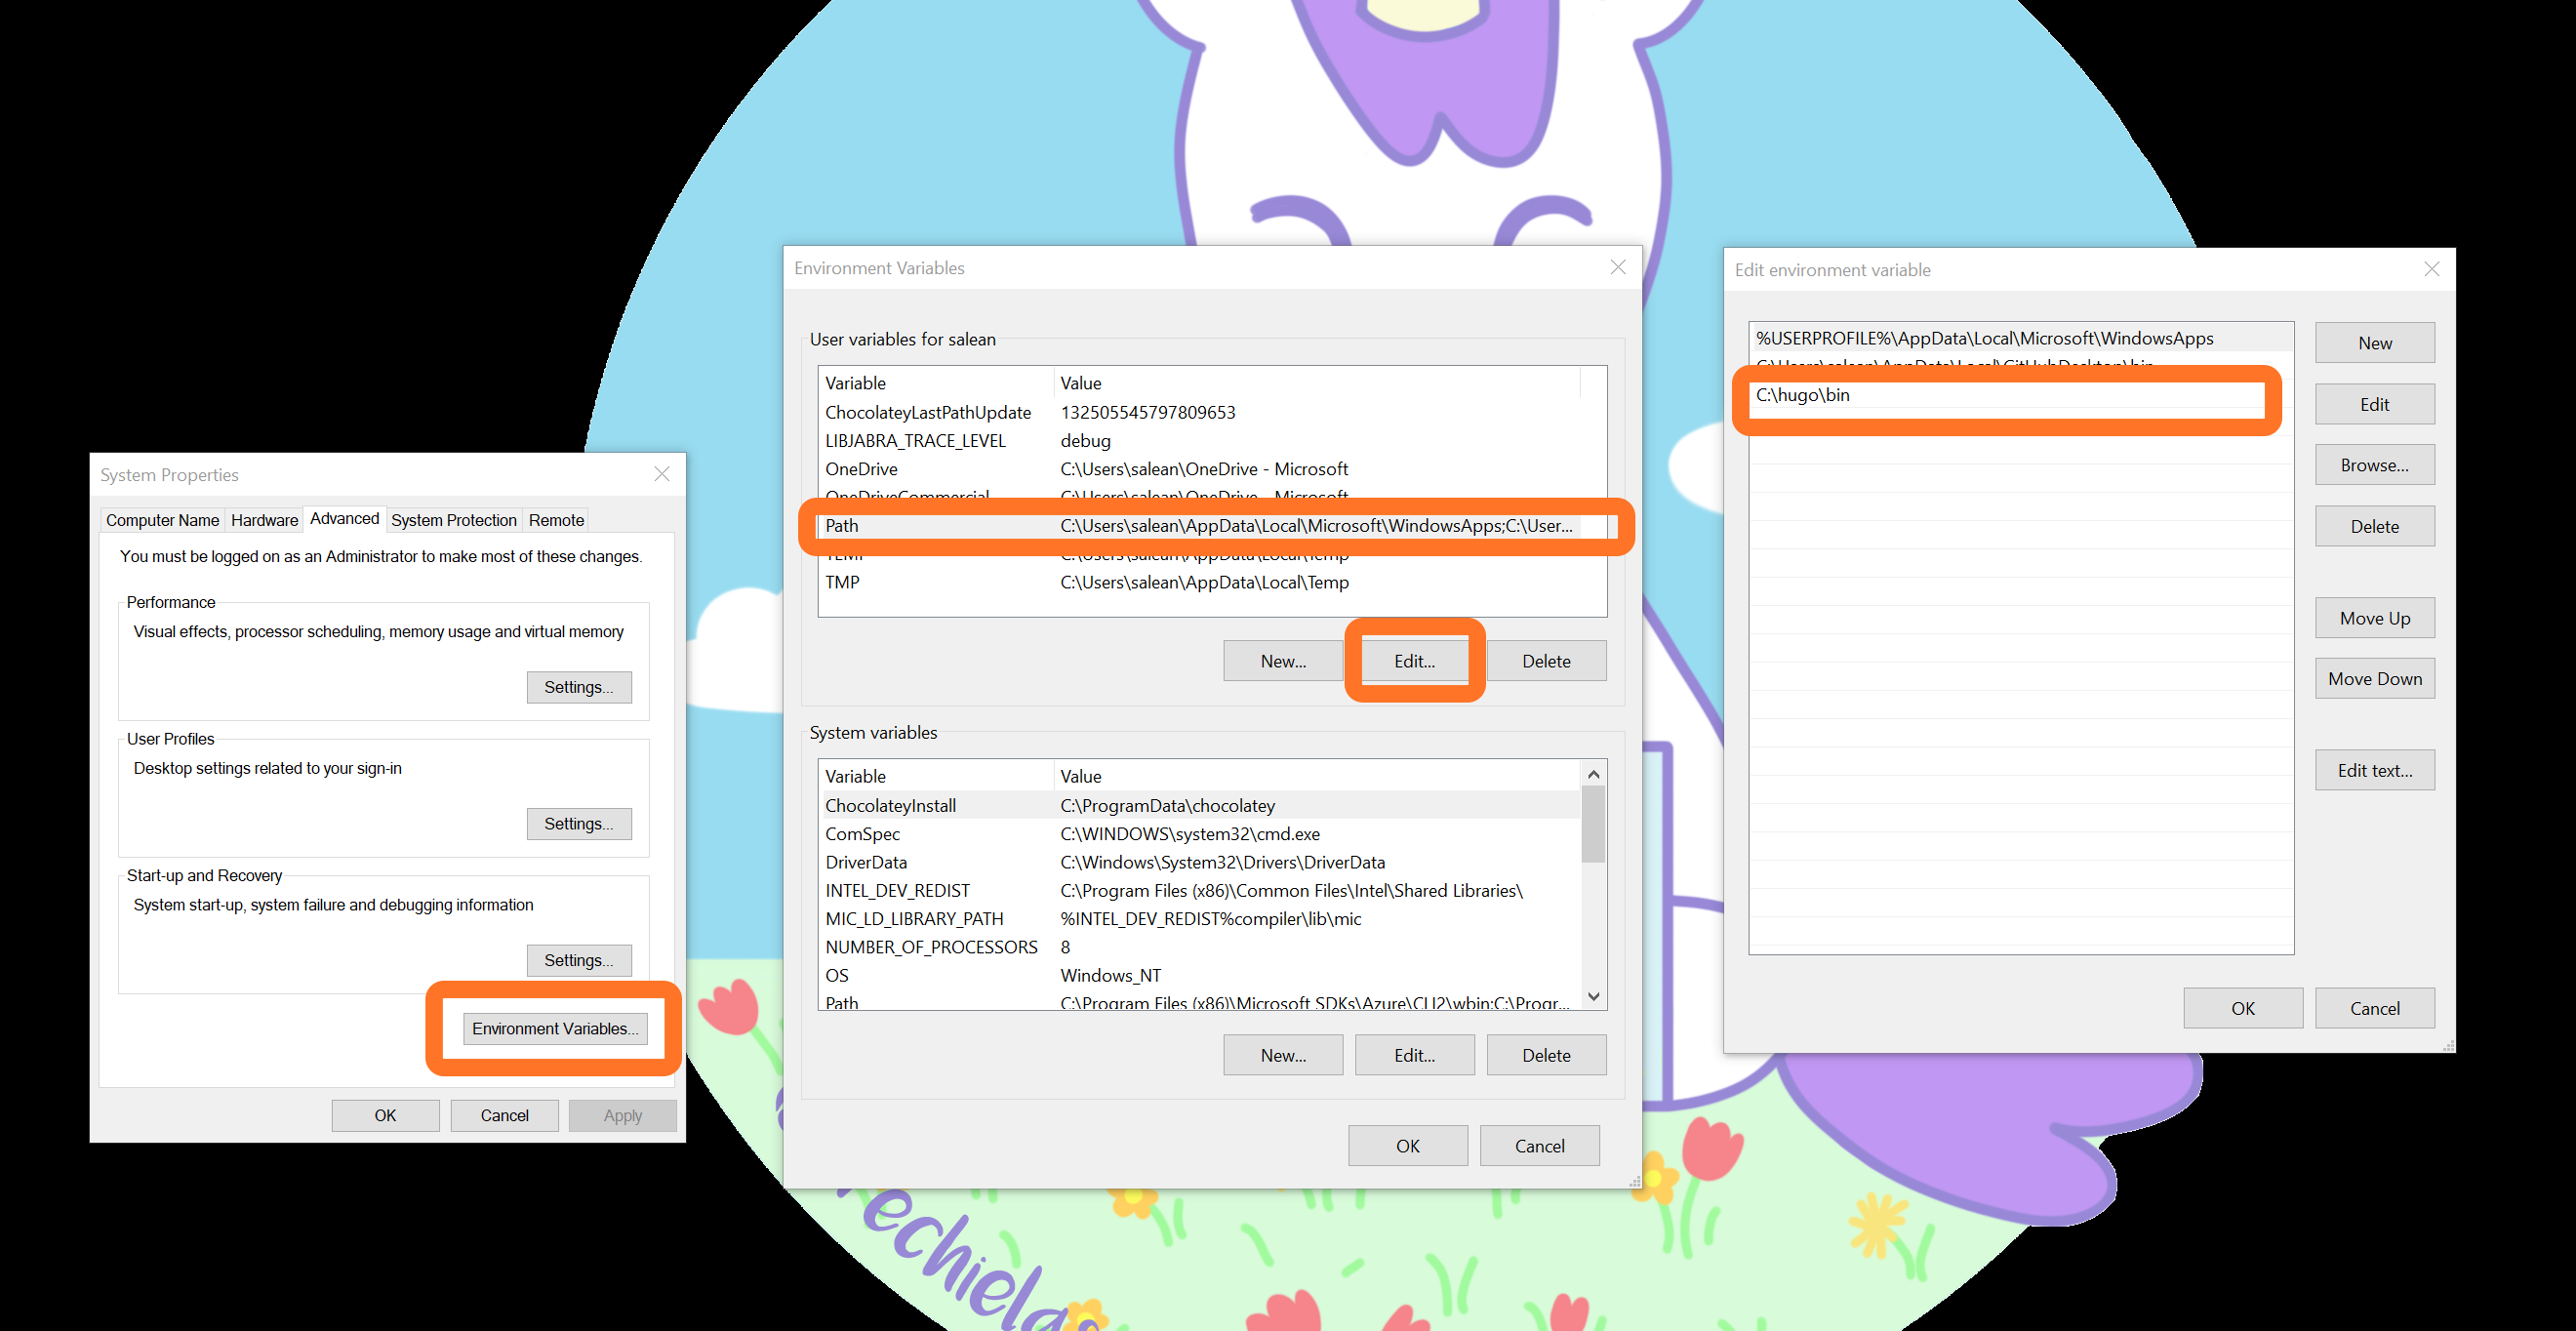
Environmental Variables
We now need to set an environment variable. If you hit the Windows key on your keyboard and then search for environmental variables, the first results should be how to edit your environmental variables.
Click on Environmental Variables at the bottom of the dialog box that is open. Click on Path in the top half of the next dialog box and edit that.
Now enter the path you extracted Hugo to. In my case this will be C:\Hugo\bin.
Test Install
To test the install open up a PowerShell command shell or a Command Prompt and type in hugo version
You should get back information on the version that has been installed!
You can now go off and use Hugo to build some funky websites! 😉