Getting started with Microsoft Flow
Getting started with Microsoft Flow

Microsoft Flow is a product that is included within your Office 365 subscription, but can also be bought seperately. It is a workflow service, which means you can use Flow to automate a wide variety of tasks that you find yourself carrying out everyday. From as simple as sending you a notification when someone mentions you in a Tweet or backing up your files. Flow comes with a vast amount of connectors, over 150 at last count, which allows you to pull in or push data to third party products/services. Some of these connectors are:
- Azure
- Bitly
- Blogger
- Calendly
- Dropbox
- GitHub
- Onedrive
- OneNote
- SurveyMonkey
- Twitter
Microsoft have provided a lot of templates to help you get started on your Flow journey, these templates are good examples of how powerful Flow can be without the need to be a developer.
Microsoft Flow Example
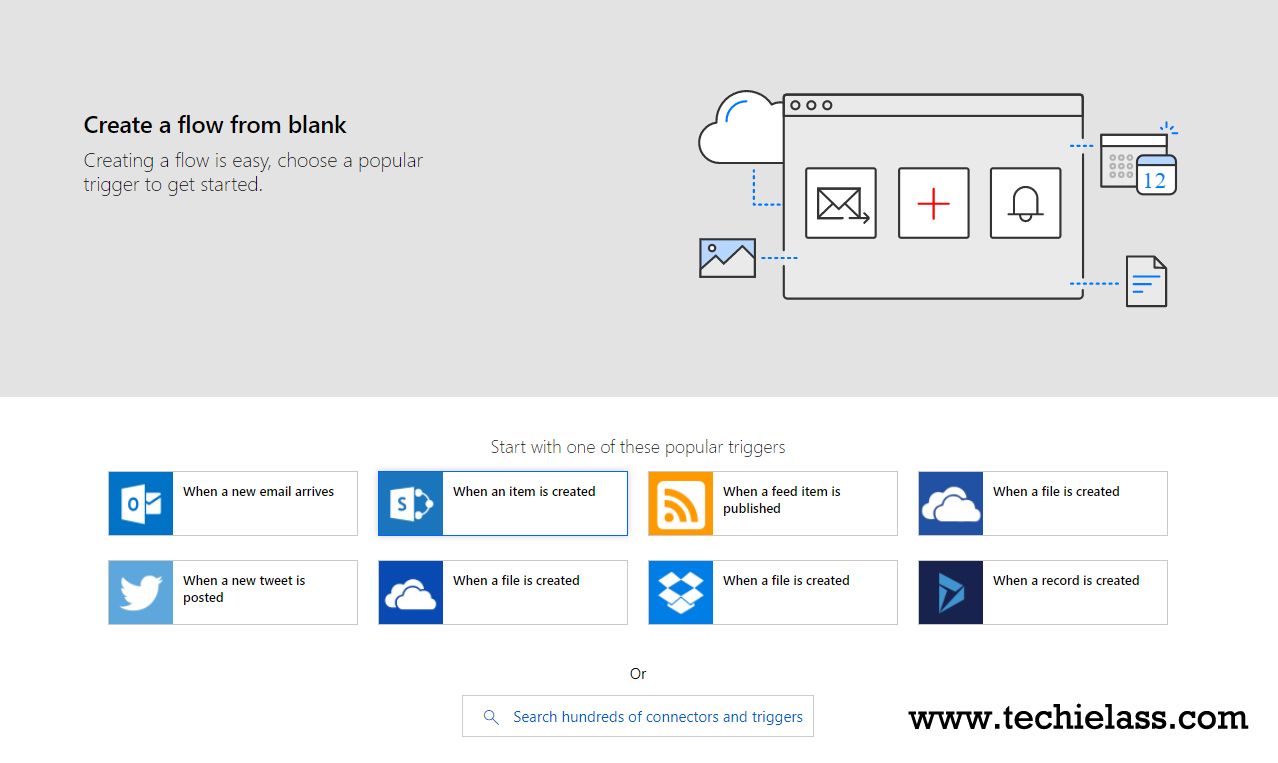
I am going to walk you through an example of collecting data from Twitter and getting an email notification. To access Flow you go directly to the website http://flow.microsoft.com Once in Flow click on "My Flows" at the top and then select "Create from blank", you will be presented with the screen below:
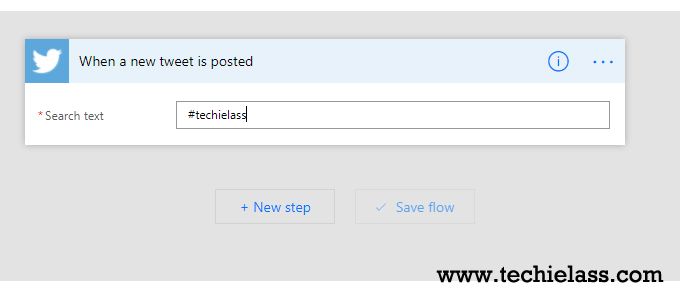
The next step is to click on the "When a new tweet is posted" trigger. Once Flow adds this trigger to your work flow you will be asked to sign into your Twitter account, once you've done this an input box will appear asking you what text you want to monitor for within Tweets. Within this example I want to be notified of any Tweets that contain the hashtag #techielass.
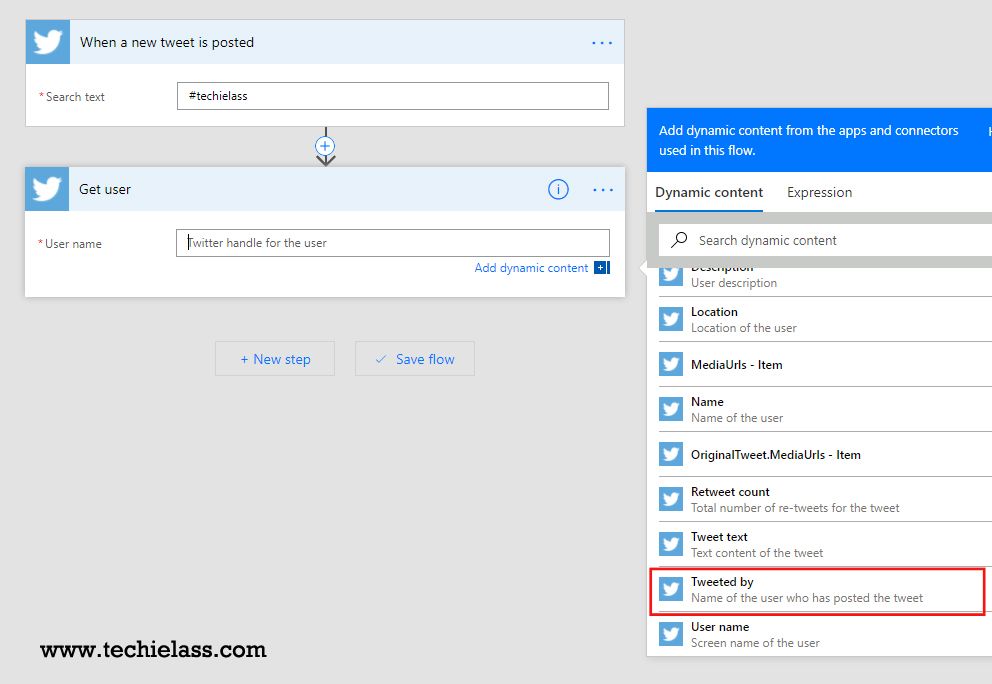
Now that I have defined my trigger I click on "Next Step" and select "Add an Action". Flow now gives me a list of things that I can do, in this case as I want to discover some more information about the person that has Tweeted so I want to search for the "Twitter - Get User" connector.

Once you have your next action added to your Flow you will be presented with some options around pulling in information from Twitter. In this case I want to get who Tweeted the post, so I select the "Tweeted by" dynamic content.
 )
)
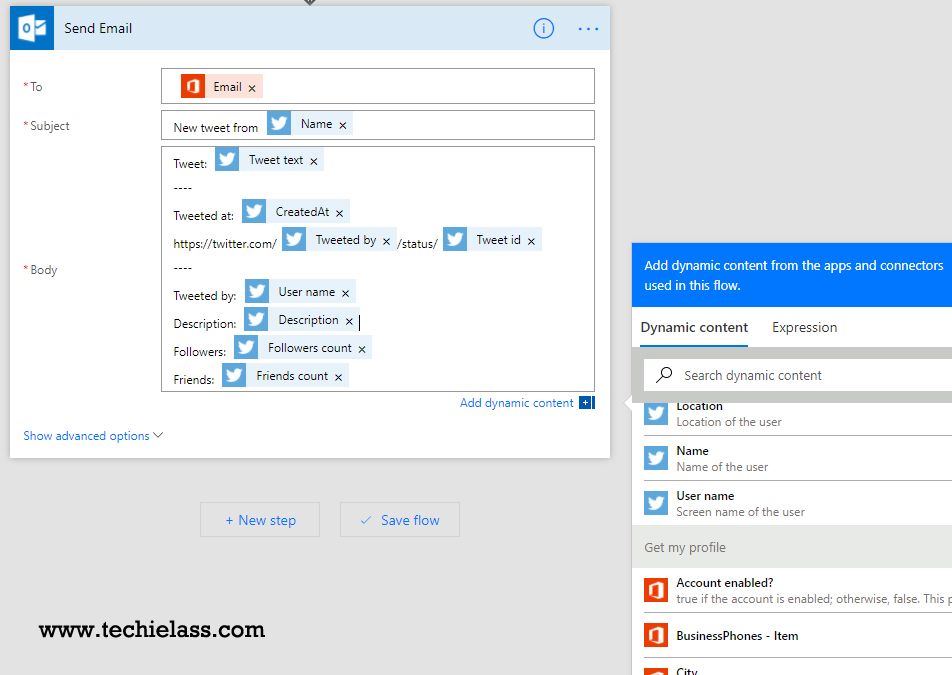
As my Flow account is provided to me via my Office 365 subscription my next step in this workflow is to pull in my Office 365 profile in order to send an email. Depending on your email provider this stage may differ. The last step in my workflow is to search for the "Send Email" action.

With my last step in place I can now start to populate how the email will look like when it arrives within my Inbox. Flow allows me to take the information that I've gather in my previous stages and use them in my email. In the screenshot below you can see I've included information from my Office 365 profile gather stage and the two Tweet gathering stages to populate information within the email that will get sent out.
As all my steps are now in place I click on "Save Flow". With my Flow active all I need to do is sit back and wait a Tweet with the specified hashtag appears.
Conclusion
Flow is an exciting product that can allow you to connect multiple sources of information together and get an output. I'd love to hear what you are using Flow for - get in touch with me via Twitter @TechieLass or leave a comment below.