Enable a CDN Endpoint in Azure
Join me as I look at how to enable a CDN endpoint within Azure.

Following on from my two part tutorial on how to create a basic Web App within Azure (Part 1 & Part 2), this blog post will be covering how to utilize Azure CDN to serve the media content within your website faster to your end users.
What is CDN?
CDN stands for Content Delivery Network. CDN is a group of servers deployed globally within multiple data centers that helps to server content to end users faster than traditional website hosting. Large parts of Internet content today is served via the content delivery network.
Why use CDN?
The number one reason to implement CDN is speed. If your website is hosted within one region but the majority of your end users are within another their experience of your website will be flawed. Where as if you use a globally distributed CDN service to deliver your static website content they will be able to receive it from a source closer to them. A CDN service, as we'll see is easy to implement, but you should consider the costs as a highly available service could result in a large bill.
Deploy CDN for your Azure Web App
Within the post we will assume that you have created and deployed a Web App within Azure already, if you haven't done that yet you can view my Web App tutorial posts:
Create CDN profile
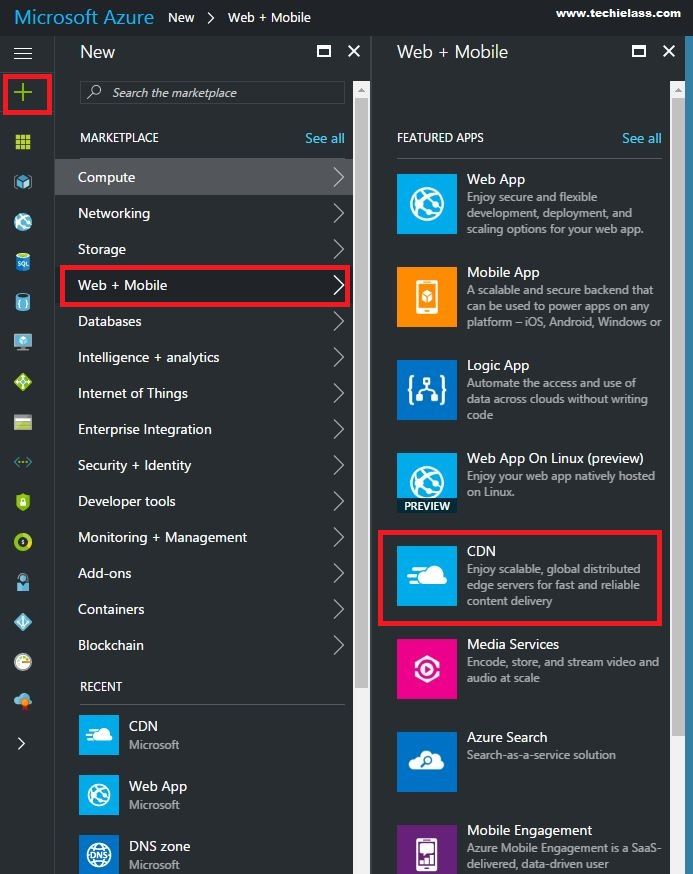
Log into your Azure portal and click on New When you are offered the different options, click on Web + Mobile then select CDN
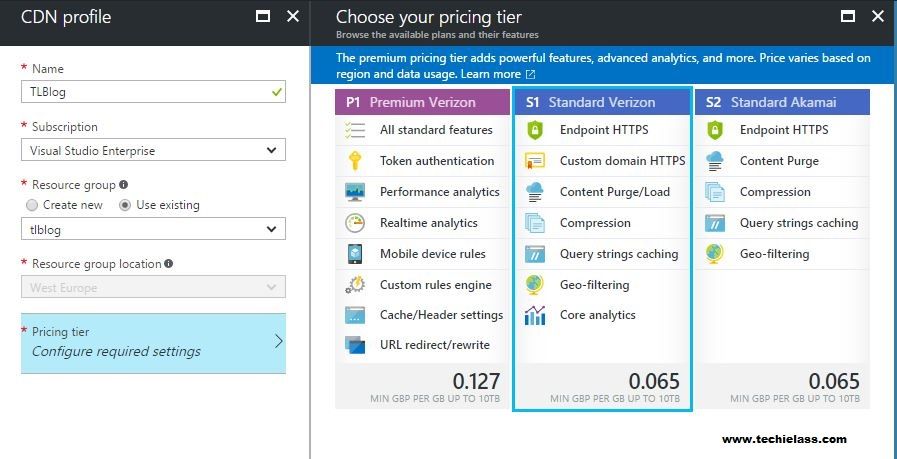
Enter the Name of your CDN profile, select a Resource Group and Pricing Tier. Then click on Select and Create.
Create an Endpoint
Now that you have a CDN profile you need to create and Endpoint that you can use. Click on Add Endpoint, enter a name for your Endpoint. The next box you need to select is Origin Type, in this example I have selected Web App as my website is hosted on Azure also. Azure then gives me a list of my websites that I can use for the Origin Hostname field. Once you've populated the relevant information add the Endpoint.

Once the Endpoint has been created you will be provided within information of the Endpoint hostname and the website that it will be used for. If you browse to your Endpoint hostname you will more than likely receive a 404 error:

This is expected as it can take anywhere between 60-90minutes for a new Endpoint to become available.
Using your CDN
Now that your CDN profile and endpoint have been deployed you need to make use of it. To show you how the CDN feature can be utilized I have created a basic website page with one image appearing twice. One of the images will be served from the Azure Web App service and the other is served from the CDN endpoint. My basic HTML code for my website is as follows: [html]
Hello From Azure - Techie Lass
Web Server Hosted Image:

CDN Image:
 [/html] As you can see the first image is pointing to the Web App images folder and the second image references the CDN Endpoint hostname and image path. When you browse to the website you can see both images appearing.
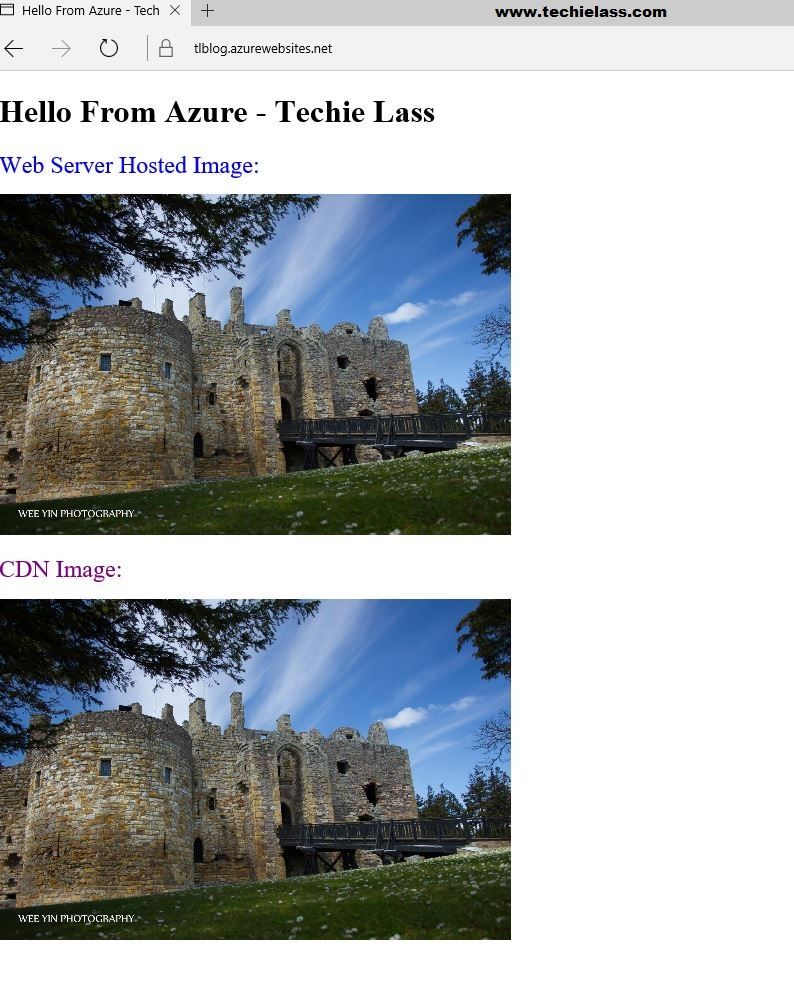
See the benefits
Utilizing Edge's Developer Tools you can see how fast the same image is displayed to the user.
- Open Edge
- Navigate to your site’s URL
- Press F12 to open Developer Tools
- Click the Network tab

As you can see from my results the CDN image is significantly faster at loading than my Web App hosted image.
Summary
Setting up CDN within Azure is fairly straight forward and only takes a couple of hours to be deployed. If your website has a lot of images, videos, etc then using CDN could significantly speed up the deliver of the content to your end users.