Azure DevOps by an IT Pro
In this blog post I explain how I’ve built a CI/CD pipeline within Azure DevOps to deploy my Grav blog website and new posts.


As you may know I moved my blog away from WordPress in August 2018 and have been running Grav on Azure since. My source code is stored in Azure DevOps and my Azure Web App has just been pulling the code into the Web App whenever I do a new commit. However, as my blog has grown with more content, images, etc when I push a new commit there is a small window of downtime on my blog while my Web App rebuilds the code for deployment.
Which leads me nicely into introducing Azure DevOps properly. Azure DevOps is Microsoft's tool that has everything you need to build your software product from beginning to end. It can help you manage code, deploy it via Continuous integration (CI) and continuous delivery (CD), manage backlogs, sprints, and a lot more.
My blog code is currently stored within the Repository (Repo) function within Azure DevOps but I have been exploring Pipelines as a way to build my code and then automatically deploy it without seeing any downtime on my blog when that is happening. I want the process to be clean and simple, I create a blog post, push the code, and then within a few minutes it is visible on my website and I don't need to worry.
I'm going to walk you through deploying a basic Grav deployment using Azure DevOps to an Azure WebApp.
Create Web App
To create my Web App within Azure I have decided to use Azure CLI and the Azure Cloud Shell
# Set the Resource Group Name
export rgname=rg-gravblog
# Set the Location for the resources to be deployed to
export datacenter=eastus
# Set the App Service Plan Name
export MyPlan=grav-blog-asp
# Set the Web App Name
export webappname=gravdemo

# Create a resource group
az group create \
	--name $rgname \
	--location $datacenter \
	--tags 'Usage=Blog'

# Create App Service Plan
az appservice plan create \
     --resource-group $rgname \
     --name $MyPlan \
     --is-linux \
     --sku S1

# Create Web App
az webapp create --resource-group $rgname \
    --plan $MyPlan \
    --name $webappname \
    --runtime "php|7.2" \
    --tags 'Usage=Blog'
The above code will create a Resource Group, App Service Plan and a Linux Web App running on PHP 7.2.
Now that you have that we need to start getting busy in Azure DevOps.
Getting code into Azure DevOps
The first thing you need to do is create a new Project within Azure DevOps. A public or private one is fine, whichever one you have access to is fine.
You should be dumped onto the DevOps Project landing page that should look something like this:

The first thing to do is add your code, so click on Repo either down the left hand side or within the center console. Azure DevOps will tell you there is no code and will give you some options to add some. In this example we are going to import code from a GitHub repo that I have created. My GitHub repo has a copy of Grav 1.5.8, plus the Quark theme and the Admin plugin. You can use this as a test or you can use your own code.
So clicking on the Import button the wizard will prompt you for the location of the code, in this case use https://github.com/weeyin83/Grav-DevOps-v1.5.8.git. Depending on what you are importing it should take a few seconds/minutes.
Building your code into a package
The next stage is to take that code and bundle into a deployable package that can be used on an Azure Web App. We do this by using the Build functionality under Pipeline. To build your code or deploy your software you need at least one agent. As you grow you might need more agents.
So let's click on Pipeline and then Build. You'll be given the option to create a new Pipeline. Let's do that.
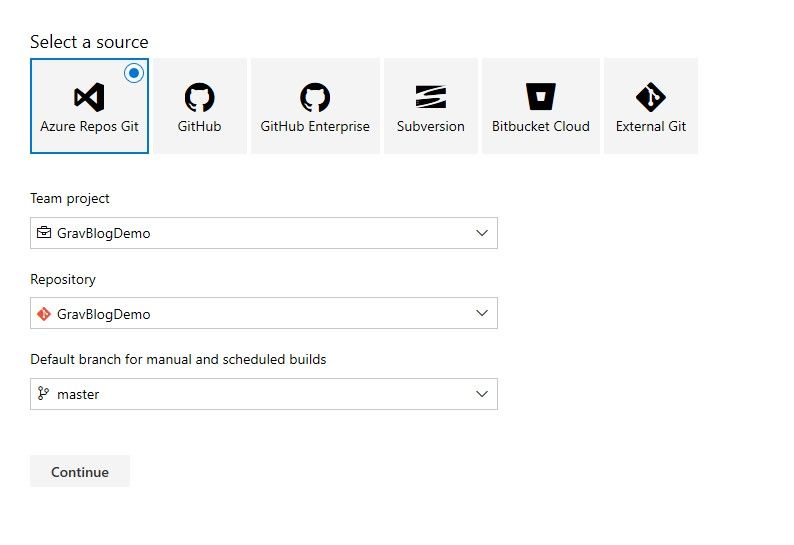
The first screen will ask you where your code is stored, in this case we are using the Azure Repos Git in our project, which has been prepopulated for us:
The next question is about whether or not we'd like to use a pre built template to help us build our code, we're going to select the YAML option and define our own:
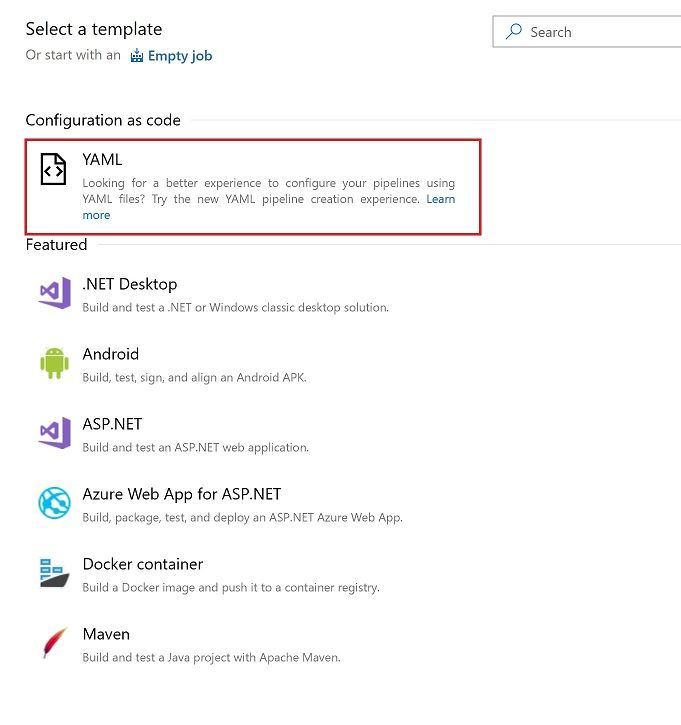
Now I've written a sample YAML and it is part of my GitHub repo here, if you have imported my GitHub repo into your Azure DevOps repo you will have the necessary file to hand.
Give your Pipeline an appropriate name, level the agent pool as the default and click on the ellipsis and find the YAML file within your code base.
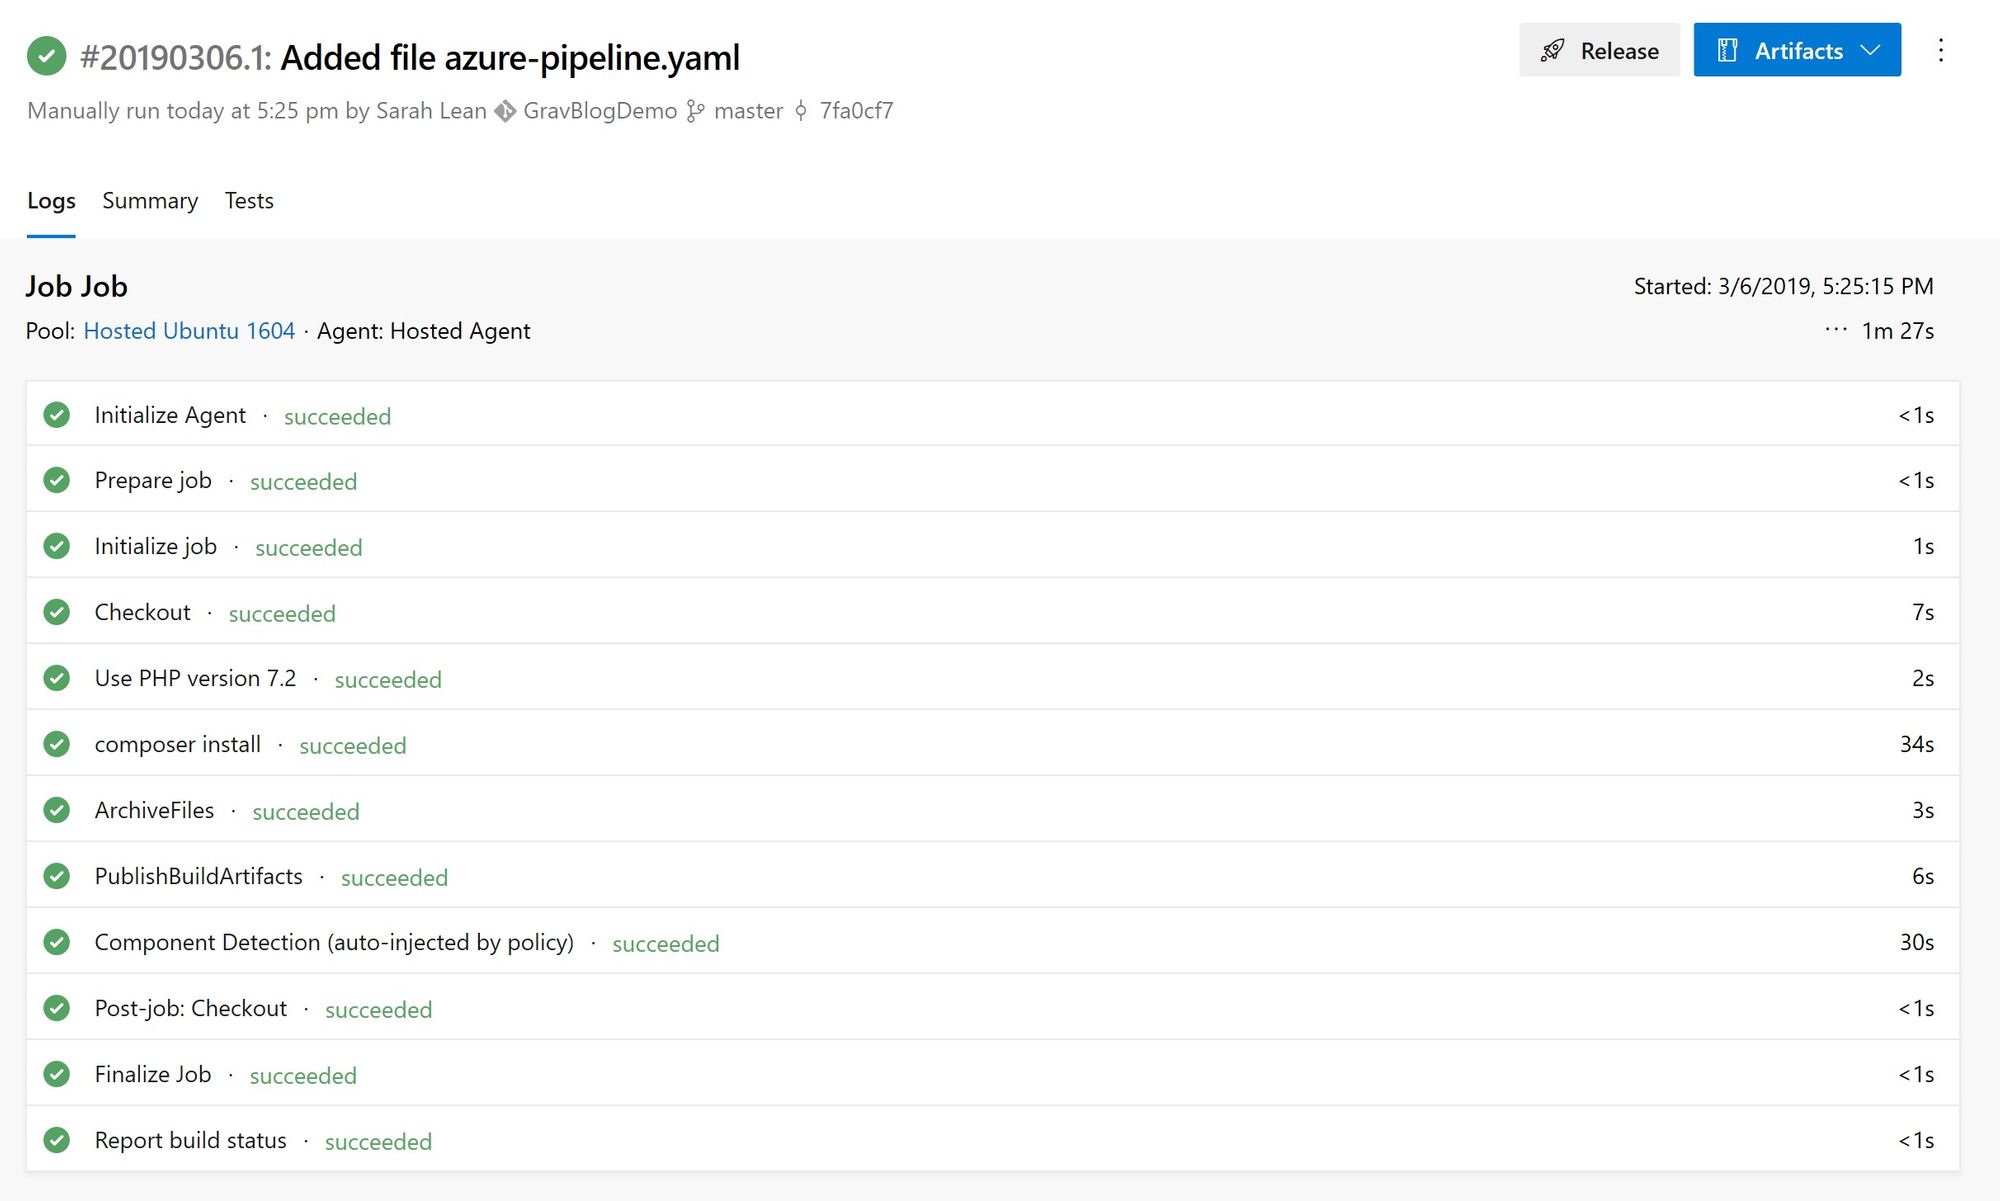
Click on Save & Queue. This will trigger the first build of your code.
This is the YAML file configuration:
# PHP
# Test and package your PHP application.
# Add steps that run tests, save build artifacts, deploy, and more:
# https://docs.microsoft.com/azure/devops/pipelines/languages/php

pool:
  vmImage: 'ubuntu-16.04'

variables:
  phpVersion: 7.2

steps:
- script: |
    sudo update-alternatives --set php /usr/bin/php$(phpVersion)
    sudo update-alternatives --set phar /usr/bin/phar$(phpVersion)
    sudo update-alternatives --set phpdbg /usr/bin/phpdbg$(phpVersion)
    sudo update-alternatives --set php-cgi /usr/bin/php-cgi$(phpVersion)
    sudo update-alternatives --set phar.phar /usr/bin/phar.phar$(phpVersion)
    php -version
  displayName: 'Use PHP version $(phpVersion)'

- script: composer install --no-interaction --prefer-dist
  displayName: 'composer install'

- task: ArchiveFiles@2
  inputs:
    rootFolderOrFile: '$(system.defaultWorkingDirectory)'
    includeRootFolder: false
- task: PublishBuildArtifacts@1
What it has done is told Azure DevOps to use a Host Ubuntu 1604 agent, with PHP version 7.2, set some PHP directories and then install Composer onto that agent. The last task bundled up the code, and in Azure DevOps terminology we call that an artifact. The artifact is then placed into a drop location for DevOps to pick up later on. In this example it's create a ZIP file.
Below is an output of my Build log and progress:
Release your code to your Web App
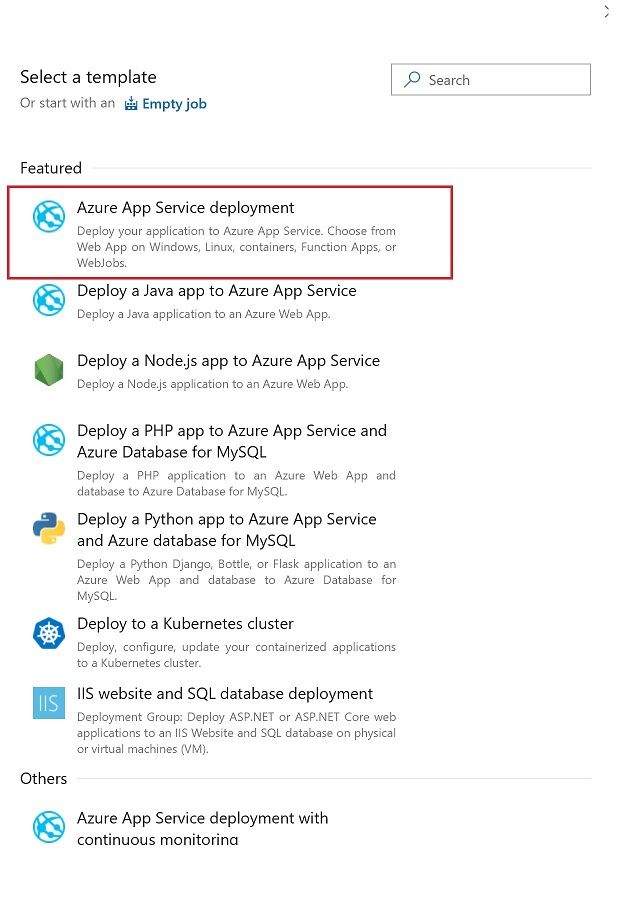
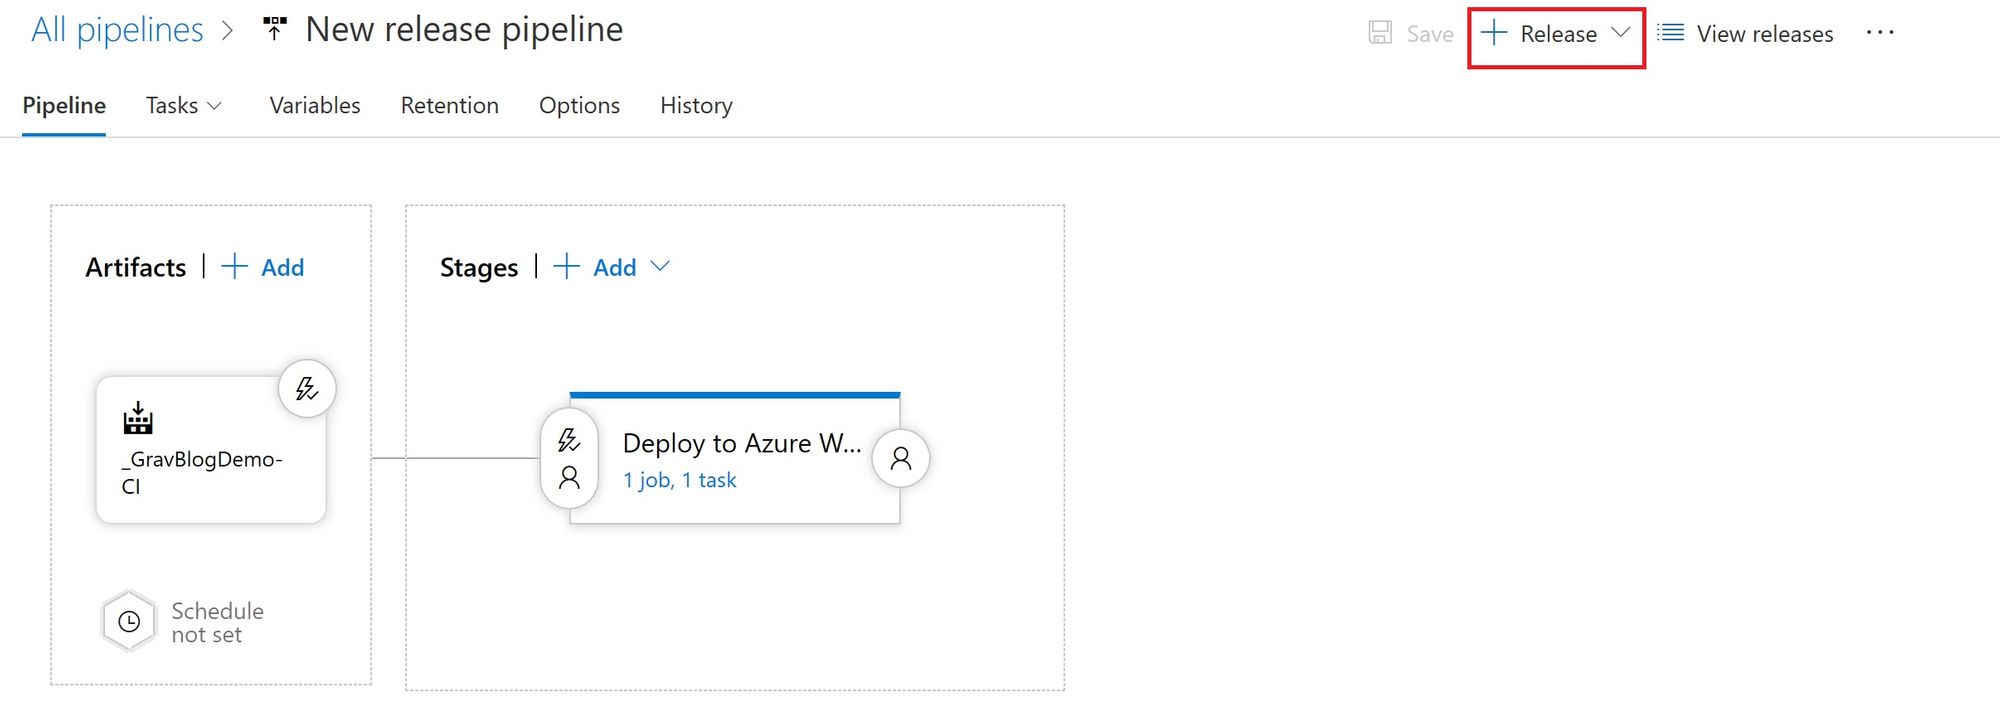
The next step is to release that code to your Azure Web App and have Azure DevOps do that automatically. So we need to click on Release under Pipelines. Again you'll be given the option to create a new one, let's do that. When it is created your first prompt will be which template you want to use, in this case we're going to use "Azure App Service Deployment".
Next we need to name the stage.
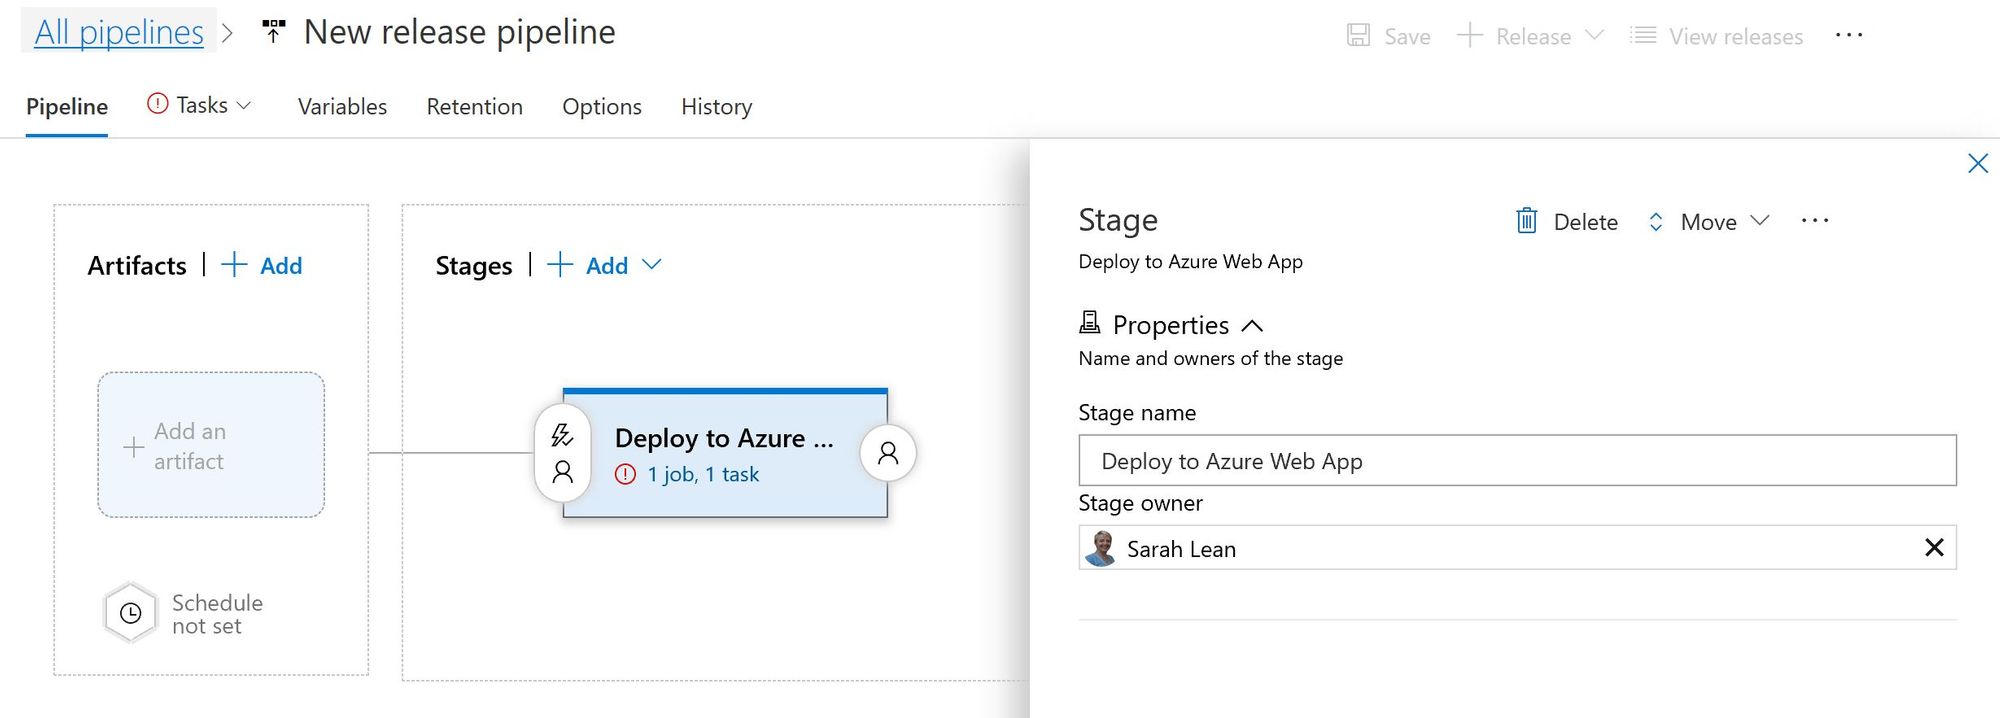
Once it'd been named, we need to start adding in some details to this release pipeline.
Let's start with the artifact. We want to use the build that we created in the previous stage. So click on Artifact and a new wizard will start.
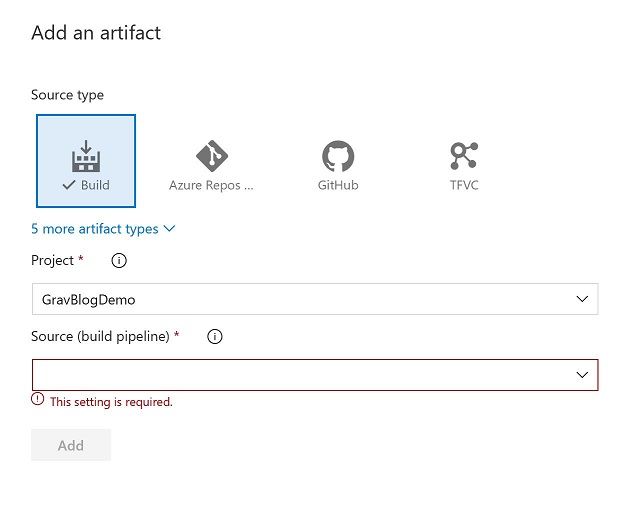
Some information will be pre-populated for you, in the empty drop down box select the name of the build that you created earlier. Once you do this more options will start to appear. For the default version I select "Latest" and then click on Add.
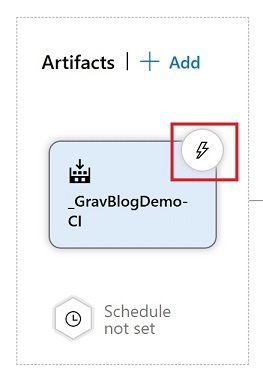
We want this release pipeline to be triggered every time we push code to our repo and a new build is created, so we want to create a continuous deployment trigger. That is the wee lightning bolt icon next to the artifact.
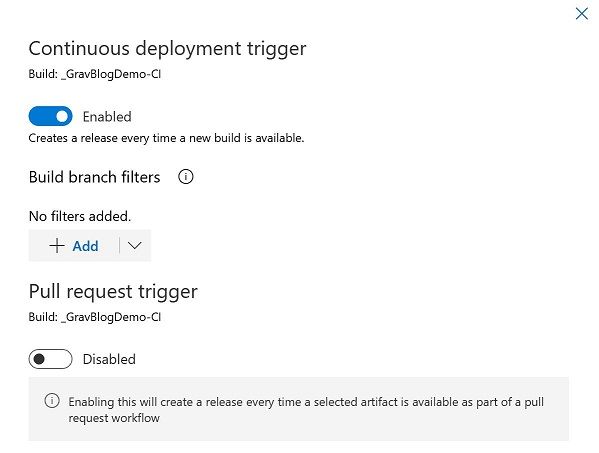
When the Continuous Deployment Trigger wizard opens we want to flick the first switch to Enabled.
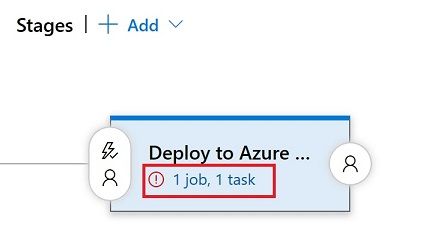
Now let's concentrate on the settings for the Stage part. Click on the section that says "1 job, 1 task".
A new wizard will open, and this is where you need to select the Azure Subscription and Web App you want to the code to deploy to. We are deploying to a Linux Web App in this case, so ensure that is selected. Once you've inputed the right information save this.
Trigger a release
As all our code is already we are going to trigger this release manually. Click on the release button in the right hand corner and create a release.
Select the pipeline you've just created and then create. This should create a release, you now need to go into that release and click Deploy on your Stage for it to initialize.
This stage should take a few minutes. Mine took just under 4minutes.
Check your Web App
Now go back to the Web App that you created at the very start and browse to the URL, give it a few seconds to warm up, but you should be greeted by the Grav Admin setup page!
Next Steps
I've just touched the start of what can be down within Azure DevOps, and this is a very basic example of using it to store code, build a package and deploy that package. You can use it to add in manual or deep testing on your code, use it to track projects and tasks within your team, pull in other software via extensions. The sky really is the limit. From my point of view as an Infrastructure specialist being able to great even a simple pipeline within the tool is extremely valuable and I'm excited to see what else I can do with the tool and grow my knowledge!